

🚀 Double your Pi 5 storage speed and capacity with Geekworm’s X1004 NVMe HAT!
The Geekworm X1004 is a premium PCIe to dual M.2 NVMe SSD HAT designed exclusively for Raspberry Pi 5 models (2GB to 16GB). It supports dual M.2 Key-M NVMe SSDs (2280/2230/2242) with independent high-efficiency power delivery, enabling stable, high-speed storage expansion. Fully compatible with the Pi 5’s official passive cooler and GPIO header, it allows booting directly from NVMe drives and comes with all necessary mounting hardware and cables for a seamless, professional-grade upgrade.


| ASIN | B0D3LP9KBH |
| Are Batteries Included | No |
| Brand | Geekworm |
| Customer Reviews | 4.3 4.3 out of 5 stars (47) |
| Date First Available | 17 May 2024 |
| Item Weight | 33 g |
| Item model number | TB-2024-19 |
| Manufacturer | Geekworm |
| Operating System | Linux |
| Package Dimensions | 11.2 x 8.4 x 1.7 cm; 33 g |
| Series | X1004 |
K**N
Works right out of the box. Compact and fits in the geekpi rpi5 metal case (a bit tight but works w/ both NVMe drives on top). The same fan cooler that comes with the geekpi rpi5 metal case also fits between this HAT and the pi itself. Also works out of the box with one of the NVMe drives being the boot drive! I used the RPi Imager (version 1.9.6) to write PiOS onto my NVMe drive using a USB adapter, slotted the drive into the slot marked as "nvme 1" and things immediately booted up, no SD card needed. `lsblk` also showed that the second NVMe drive that I slotted in is being recognized (just have to tweak fstab at this point). * disclaimer: only thing I have not tested is the IO speed bc I'm not doing anything that requires production-levels of IO
S**H
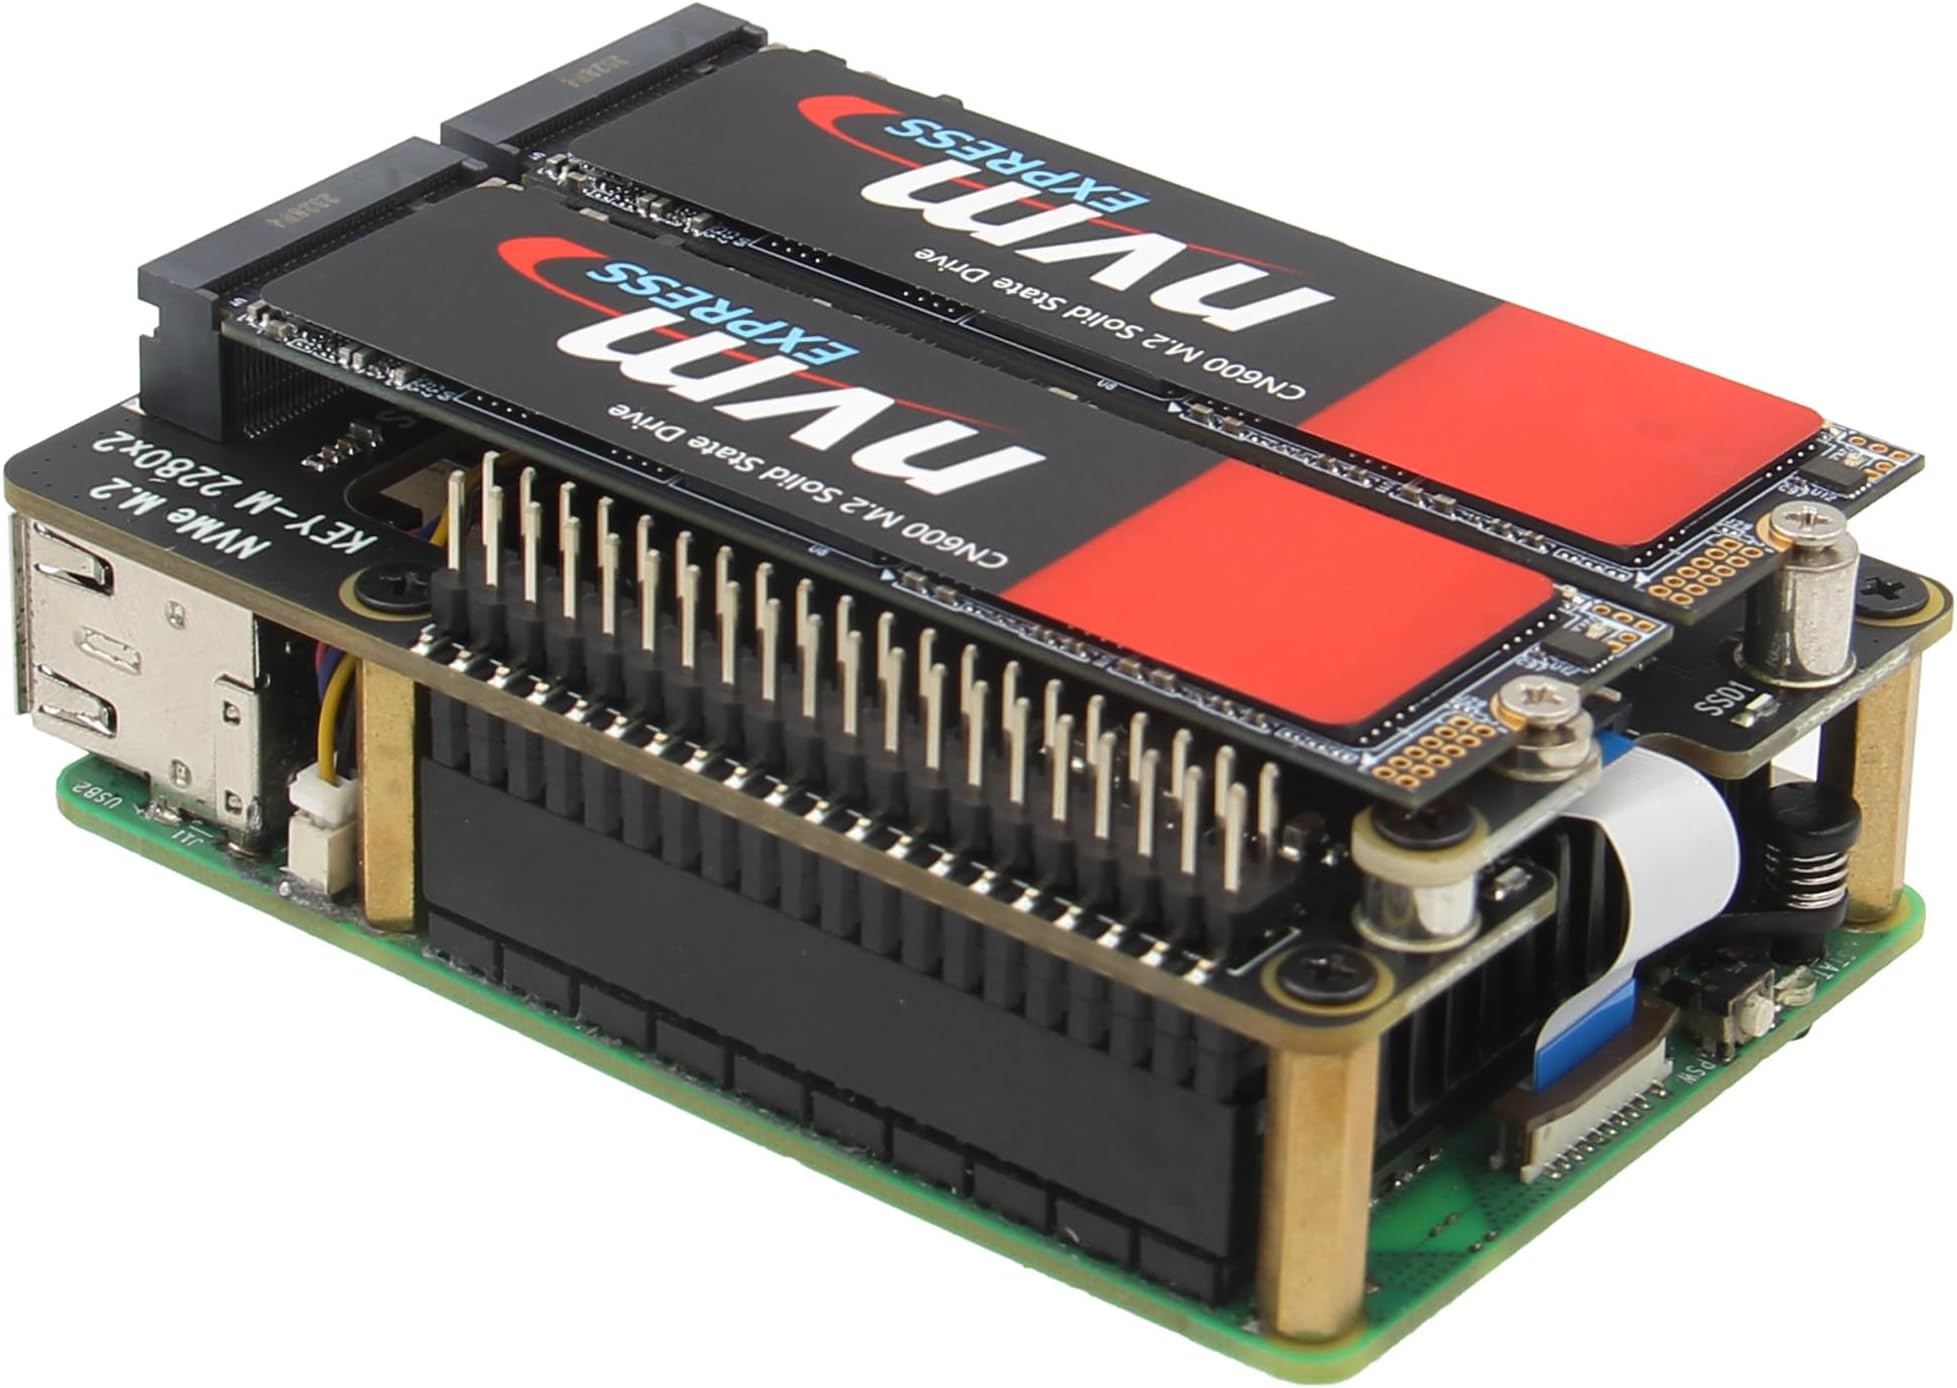
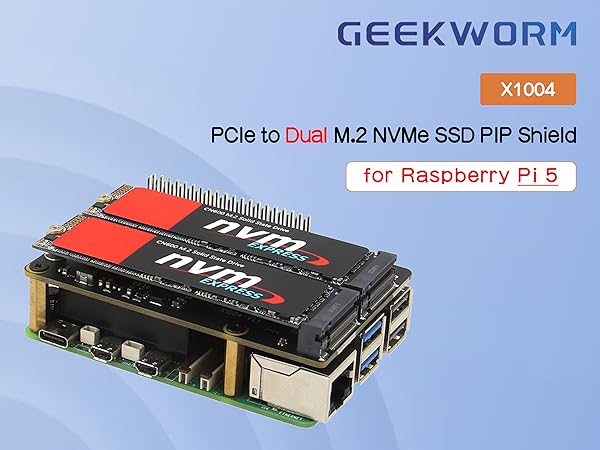
I'm building a Raspberry pi 5 NAS. I currently have a single slot populated with an HP FX900 Pro 2TB, and it seems to work just fine. It benchmarks between 700MB/s and 1000MB/s (read and write) with PCIe gen 3 enabled in raspi-config. That's really slow for what the disk can do, but really fast for an embedded computer, and plenty fast for serving files on a gigabit network. I haven't tested with both slots populated yet, but I'd expect bandwidth to be shared across both disks. I also haven't tested booting from PCIe yet. When I get my second disk I'll update the review. I'm using it with the official raspberry pi 5 cooler, and that fits nicely underneath. I think the solid GPIO connector blocks airflow a little, but only on one side, and cooling performance doesn't seem to be impacted. And it doesn't connect with pogo pins like some other manufacturer's nvme boards do, so it's not going to fail because a pogo pin broke, vibrated out, or got stuck. Additionally, the area underneath the disks is clear. Some other designs have connectors or chips there which prevent some disks, especially double-sided disks, from fitting correctly. And, it comes with all the standoffs and screws needed to attach the board to the Pi. My only complaint is that it includes an unshielded FFC ribbon cable. PCIe is a high speed bus, and unshielded cables are more susceptible to EMI. In data storage in particular, you definitely want signal integrity between the host and the disk. Having said that, it seems to be working. But my use case is for long term data storage, so I'm going to replace it with a shielded cable, and use a filesystem with checksums. Overall it's pretty good.
K**Y
This hat is a great addition to the Raspberry Pi. I am able to boot my Ubuntu 20.04 from the SSD without having a SD card inserted. You just need to write the image directly to the SSD. I wanted to use the Raspberry Pi as a file server to share large file with friends.
M**N
This thing looks great but I lost the ribbon cable. I do know what one to buy to replace it. Mike
W**.
The instructions were very basic and didn't explain which of the two included ribbon cables to install (or why there's two cables included that look different and only a place for one cable and only one cable in the install instructions) nor did it provide any instructions on how to actually install said ribbon cable. it was very very difficult to slot the hat into the GPIO connector and i was seriously concerned i was going to snap the hat in half trying to push it into the GPIO connector. With the hat pressed all the way down (as far as I could without literally getting out a hammer) into the GPIO connector there was a 4-5mm gap between the bottom of the GPIO adapter and the Pi5 device. The "instructions" image shows no gap whatsoever. The smallest riser I have is snug to the Pi5 and the nvme hat so it doesn't appear there's enough room to have it flush down like shown in the picture. This "hobby" of tiny computing seems to be difficult to get into due to the high difficulty level of building and configuring everything, and manufacturers of these products aren't making it any more consumer friendly by having sub-par instructions and lack of insight when it comes to the installation processes.
Trustpilot
3 weeks ago
2 days ago