Description
🚀 Upgrade your Ender 3 with the ultimate 32-bit brain and smart display!
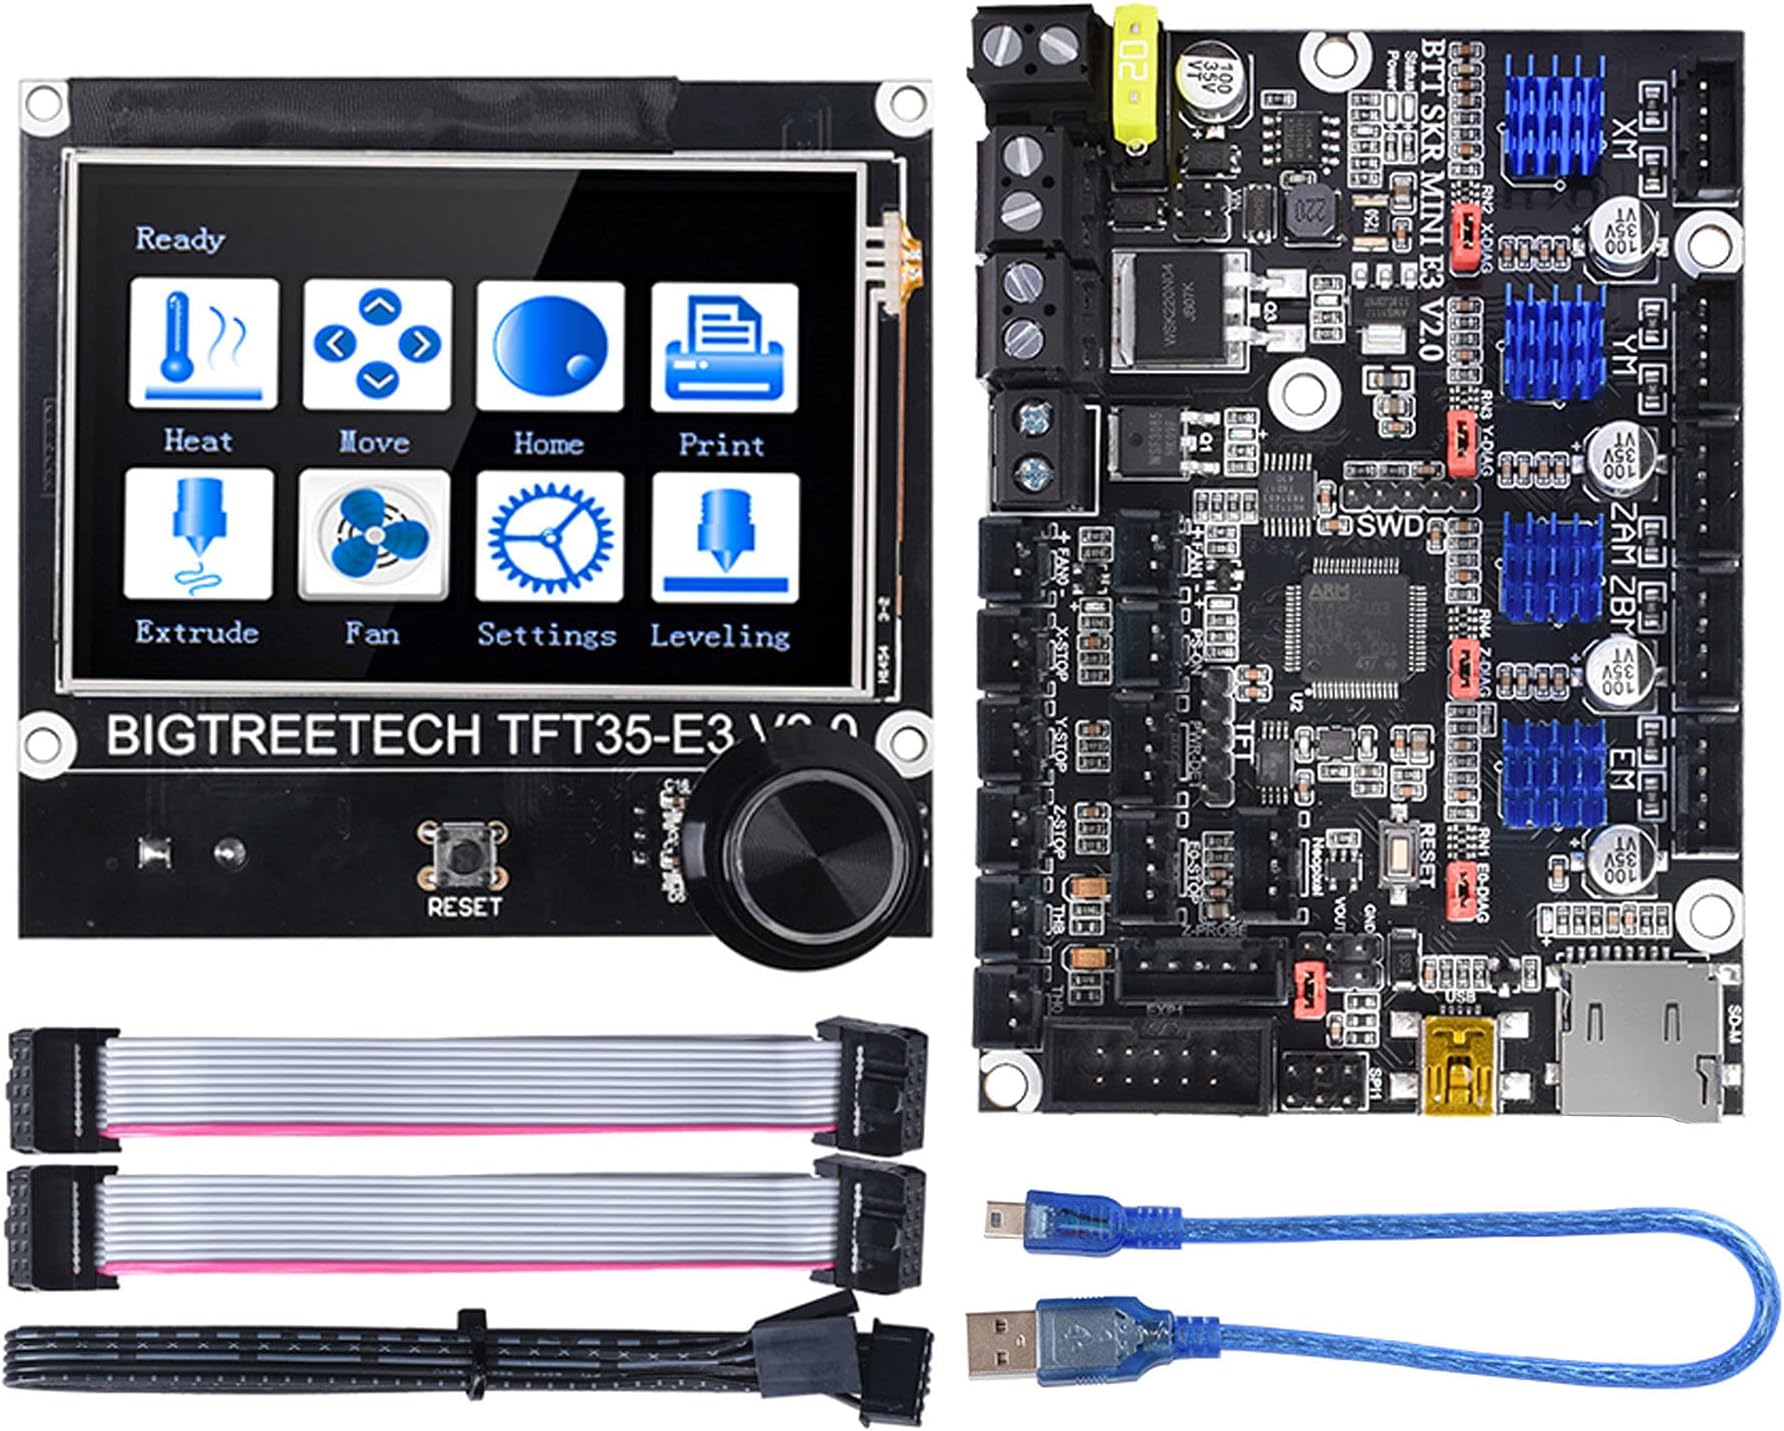
- SMART THERMAL MANAGEMENT - Upgraded MOSFET and 4-layer PCB maximize heat dissipation, ensuring stable long prints
- ADVANCED FEATURES FOR PROS - Supports BLTouch, filament detection, power-off resume, and sensorless homing for flawless prints
- BLAZING 32 BIT PERFORMANCE - ARM Cortex-M3 CPUs at 120MHz & 72MHz power seamless 3D printing control
- NEXT GEN TOUCHSCREEN CONTROL - TFT35 E3 V3.0 offers dual-mode display with SD & USB print support for ultimate convenience
- MODULAR OPEN SOURCE FIRMWARE - Marlin 2.0 compatibility empowers DIY customization and future-proof upgrades
The BIGTREETECH SKR Mini E3 V2.0 paired with the TFT35 E3 V3.0 touchscreen is a powerful 32-bit control board upgrade for Creality Ender 3 printers. Featuring dual ARM Cortex CPUs, advanced thermal design, and open-source Marlin 2.0 firmware, it delivers enhanced printing precision, ease of use, and DIY flexibility. With smart features like sensorless homing, filament detection, and power-off resume, this combo transforms your 3D printer into a next-level, professional-grade machine.