


✨ Light Up Your Life with a Starry Touch! 🌌
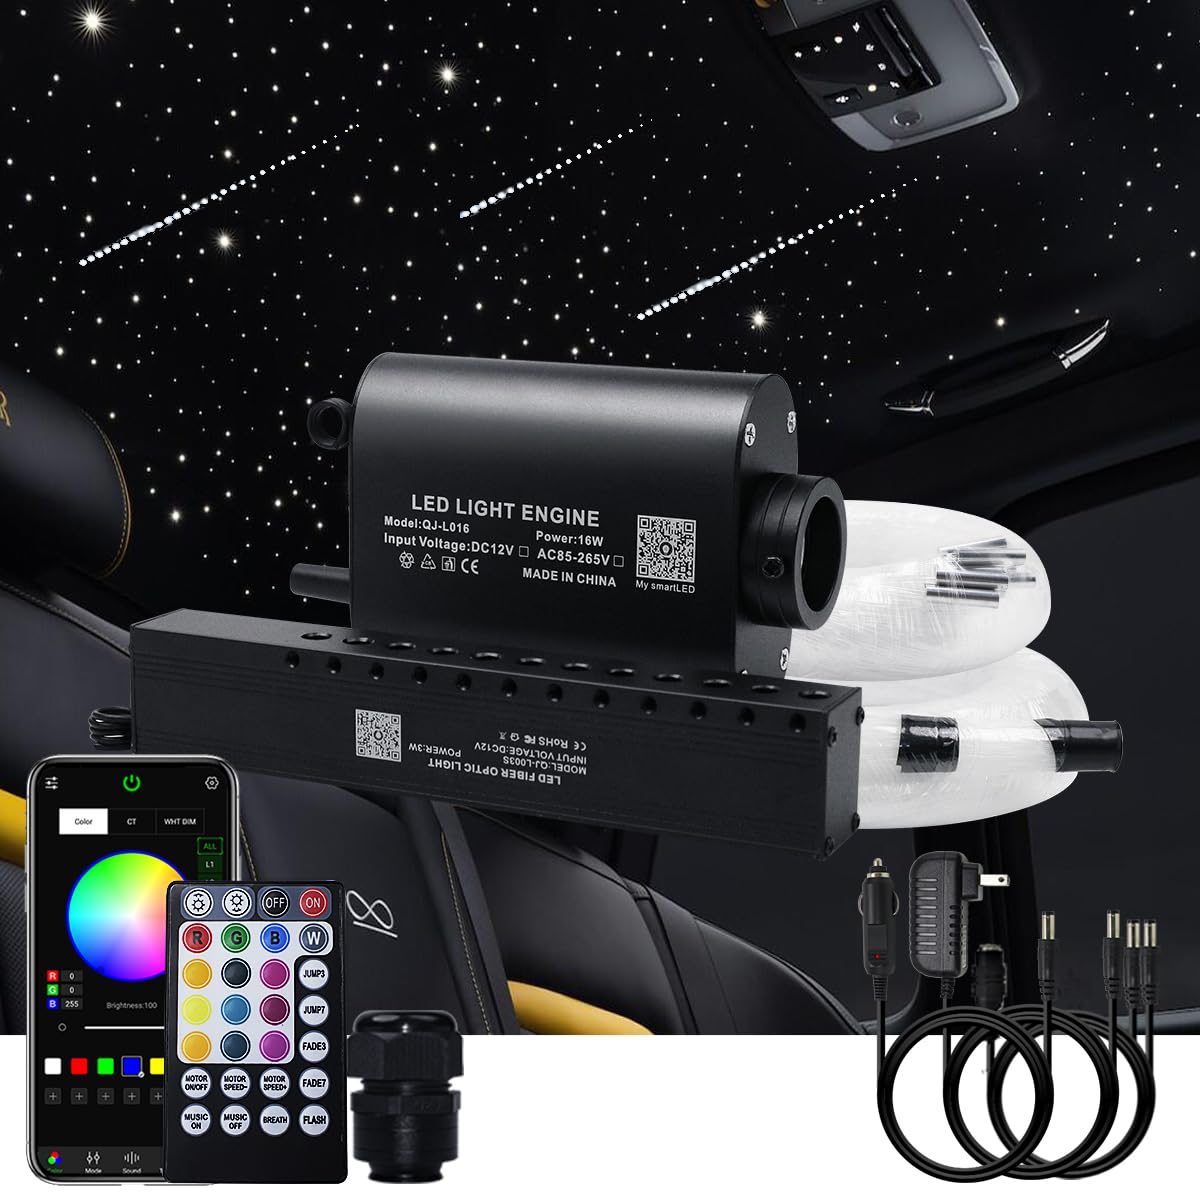
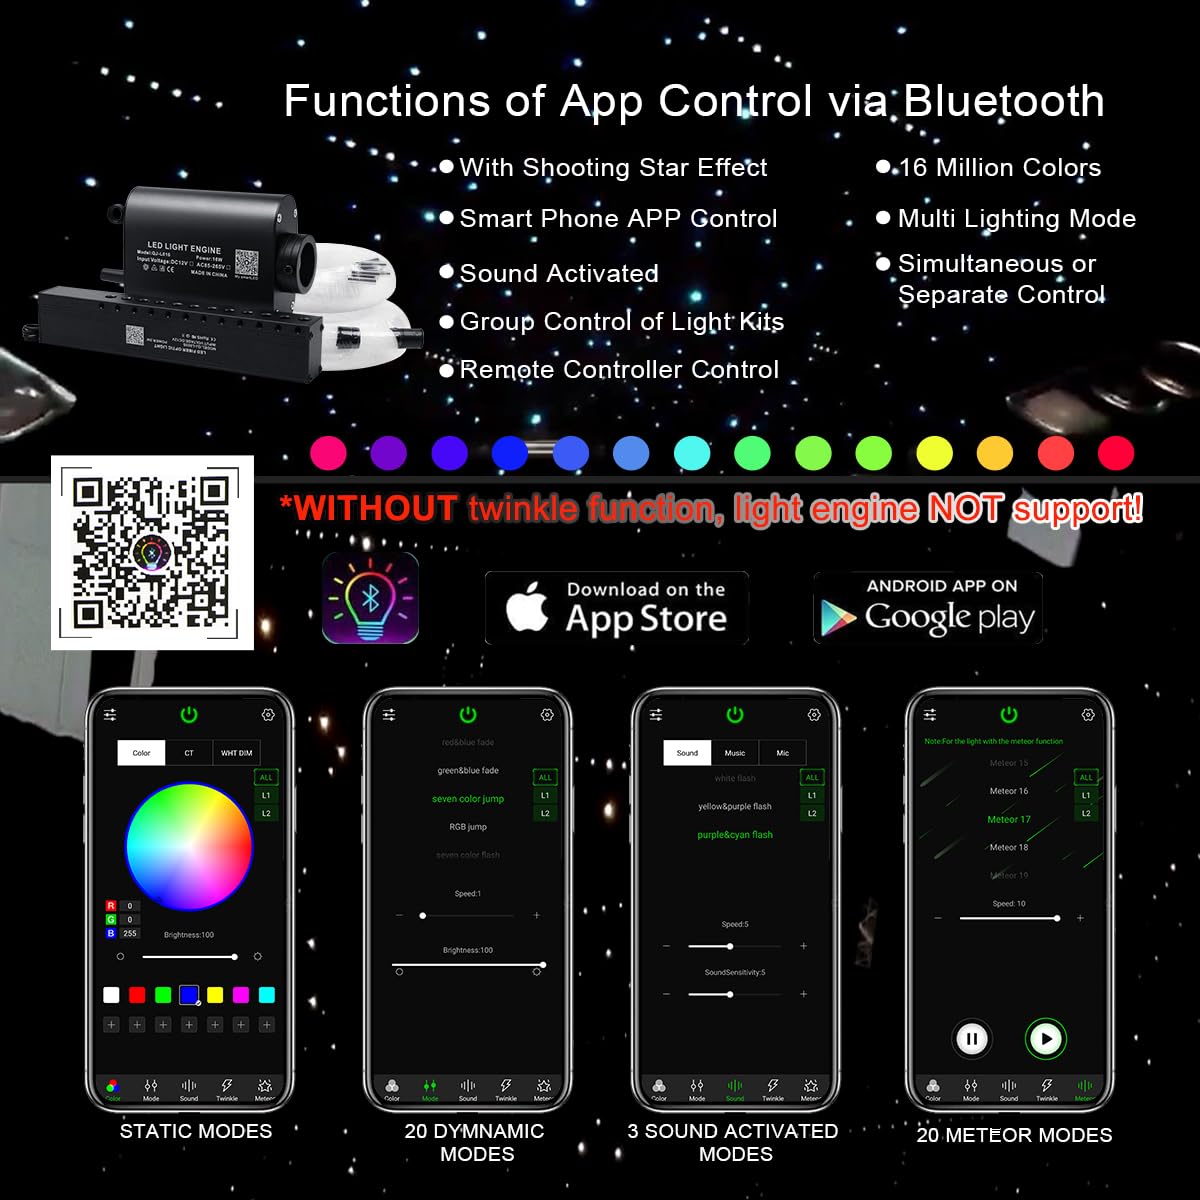
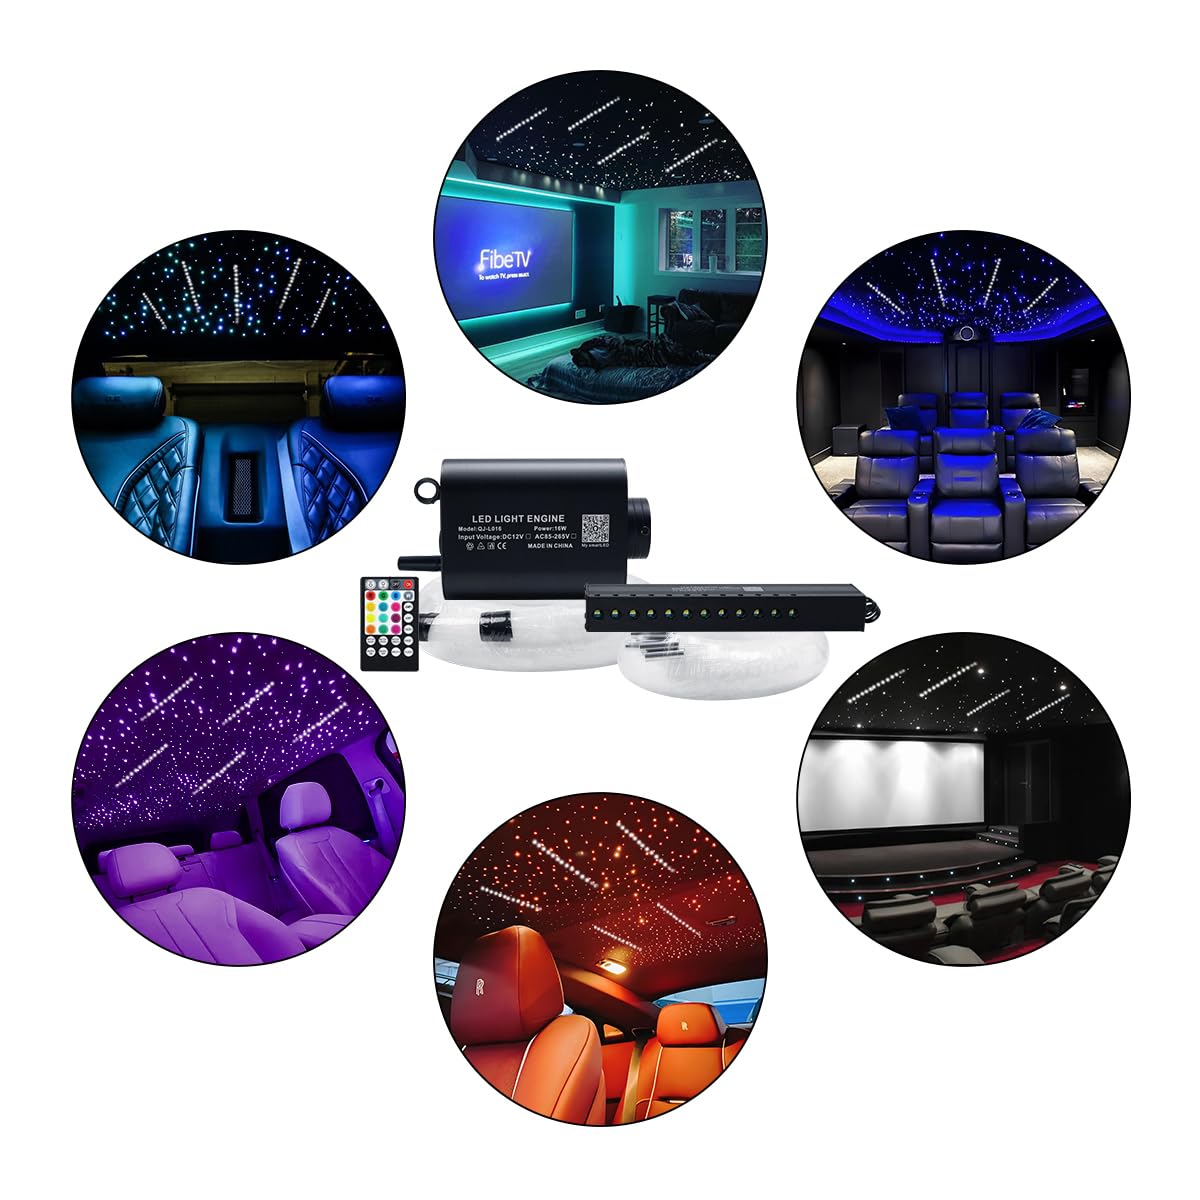
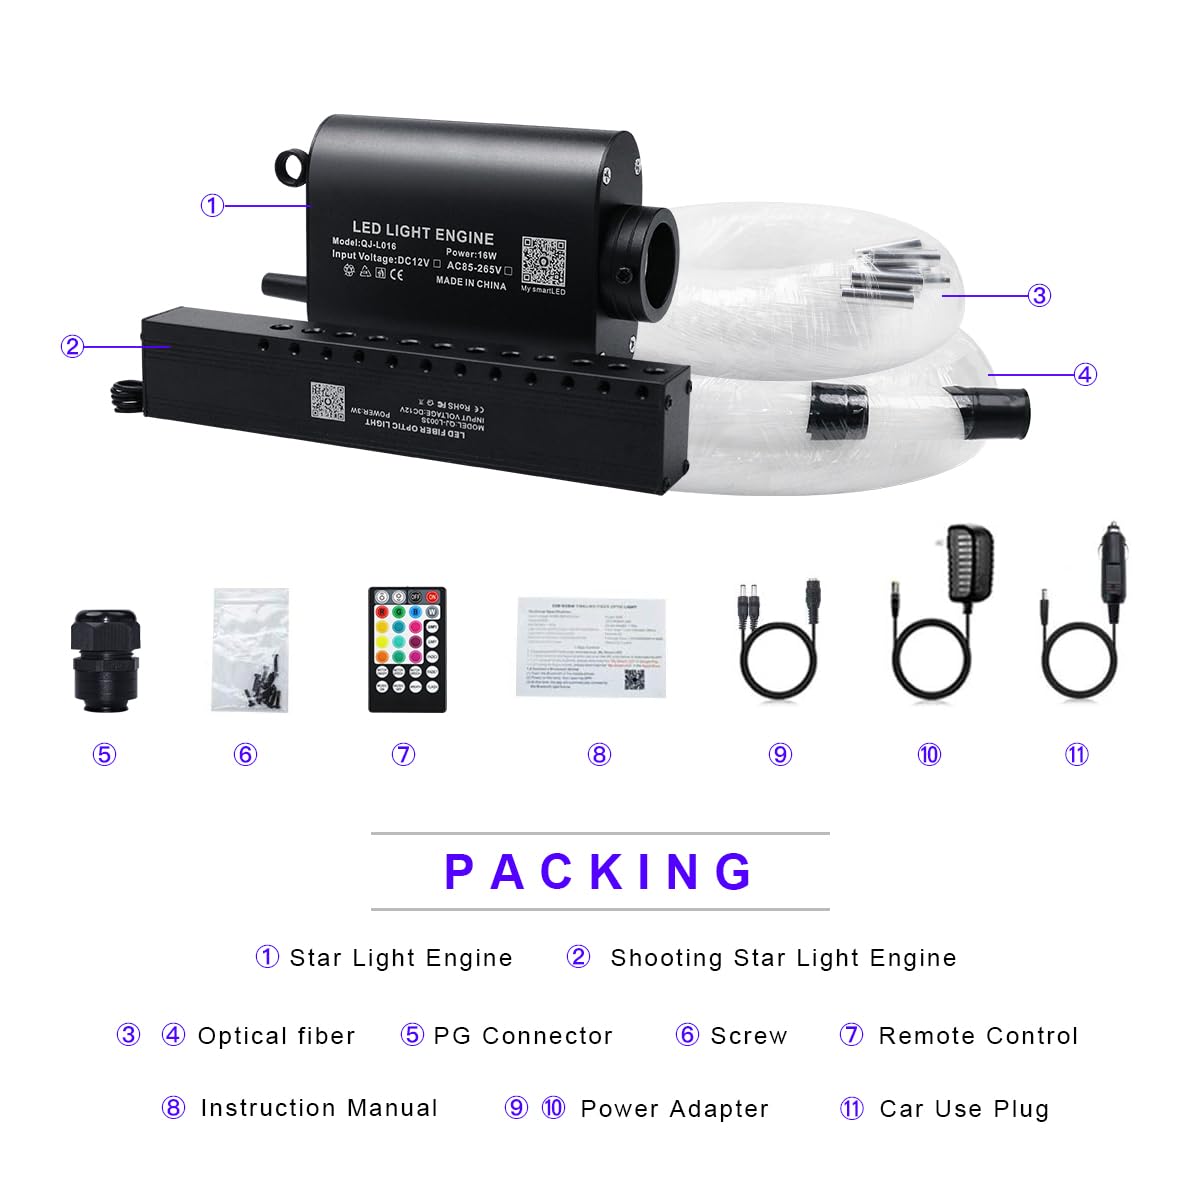
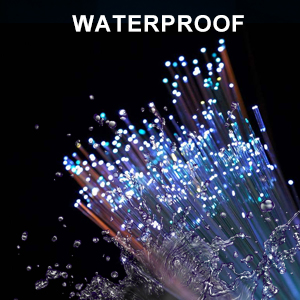
The AKEPO 16W Car Home RGBW APP + Music Activated Fiber Optic Lights Kit transforms any space into a celestial wonderland. With 430pcs of mixed fiber cables and a 28-key remote, you can easily create a romantic atmosphere or a vibrant party vibe. The upgraded app control allows for over 16 million color options, while the shooting star effect adds a touch of magic. Waterproof and safe, this kit is perfect for both home and car use, ensuring a stunning display without the risk of electric shock.


| Item model number | 16W |
| Product Dimensions | 121.92 x 91.44 x 30.48 cm; 1.83 Kilograms |
| ASIN | B08BZJC894 |
S**K
So far so Good
So far so good
B**.
Worked great
Works great for my project, I was not installing it in my care but using it for a odd shaped lamp. The fibers can be time consuming to thread through the material but ultimately end up looking great. The only issue I really had was how short the wire for the wall outlet plug is, had to splice it for my needs.
S**U
Gives ur car interior new life
Genuine price , best quality and easy to install
A**R
Recommend
Time consuming but worth it
Z**N
Step by step install process
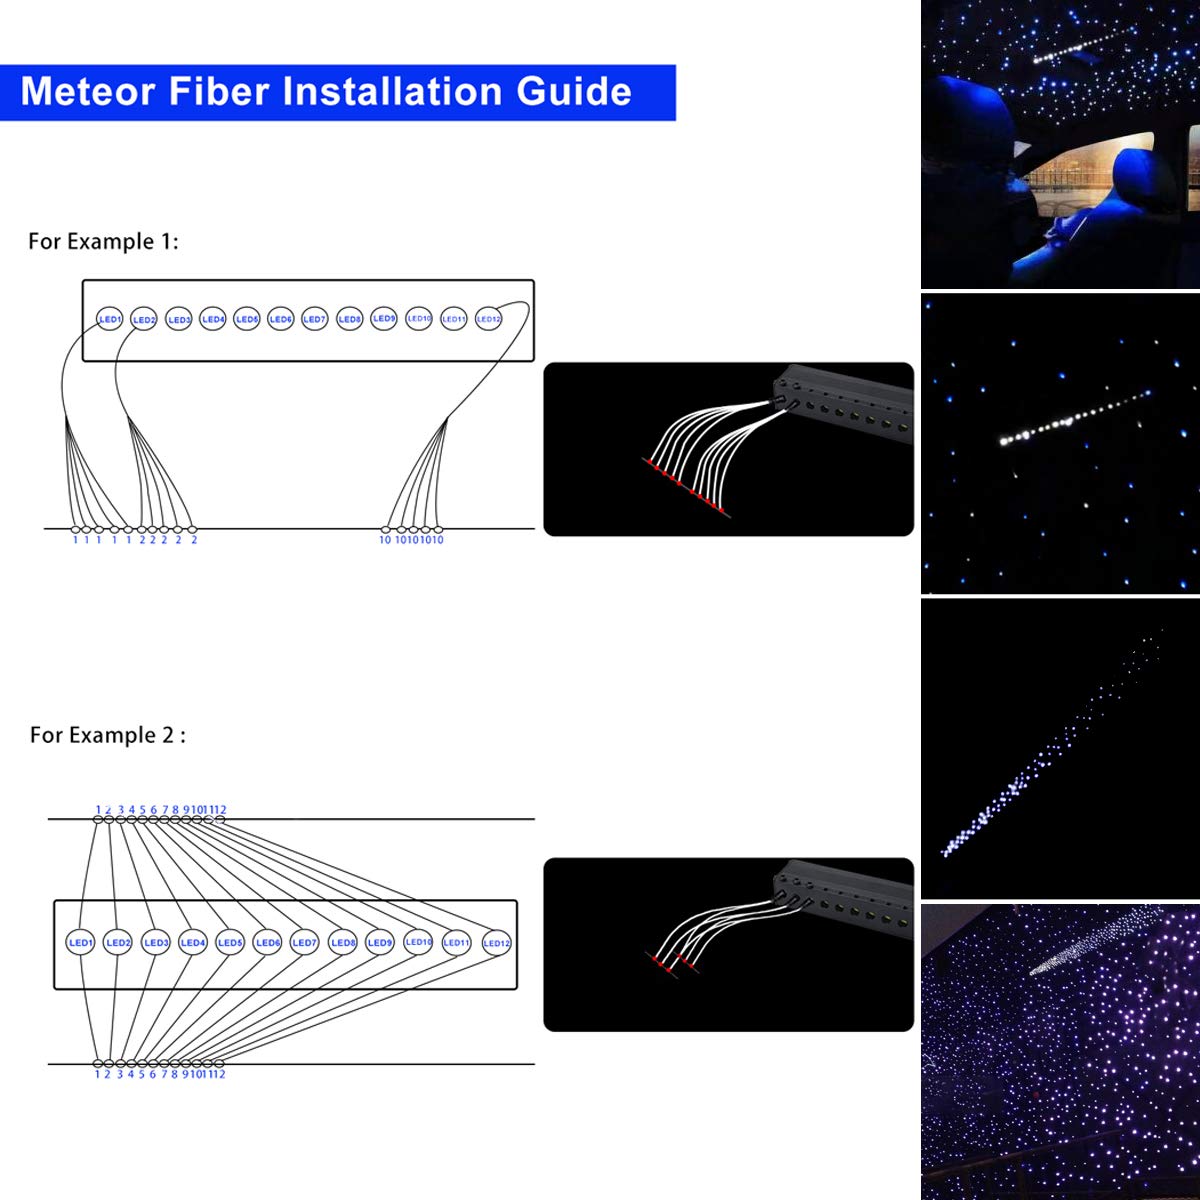
The overall project took about 3 days (18 hours) of work, lookup YouTube videos, BE WARNED, don’t get in over your head with this it is a big project but well worth it. Start by finding a video of how to remove the headliner, generally secured by screws in the visor and clips on the plastic trim and seal of the vehicle, once the headliner is removed use a colored sharpie and divide it into 4 sections, you can do more if it’s a big headliner as I drew 10 sections as I have a big SUV, then divide the sections by how many fiber optics you got, mine was 10 sections, 550 fiber optic cables, so it was 55 cables per section, I also made 10 sections so I knew the lights would be evenly distributed, then mark your sections with a dot or X to know where to make the holes, use a small drill bit (drill is highly recommended as there are a lot of holes to make) or use a tac, drill all the holes then grab your fiber optic cables and start from the back to front feeding the cables into the holes, make sure you have a good spot to put the light box inside of your trim or if it fits in the headliner, feed all excess Clarke’s through the holes to avoid a bunch of slack and bulk to the headliner, once’s all cables are fed through begin hot glueing (USE LOW TEMP HOT GLUE GUN) or an epoxy like E6000 which you can find at your local Walmart, if you use the epoxy which I recommend, don’t be stingy, make sure there’s plenty of glue in each hole where the cable is fed through to avoid them slipping out and you having empty patches. Look Also for epoxy let it set overnight to create a strong bond, hot glue is a fast way to secure the cables but be careful as even low temp guns can melt the cables from the temp, some glues like superglue will also break the cables do to the chemicals, so use E6000 epoxy. Make sure you glued ALL the cables down look over it a few times you’ll find some you missed I promise, Once it’s all prepped to be re installed call up a friend to help, you’ll need it, start by feeding the headliner preferably through the trunk and secure it from the front to back, ensure your cars door seals go back over the headliner so you don’t get a leak, make sure all clips are back in place and test out the lights. begin trimming your excess cables flush with the headliner, use normal sized nail clippers or thin small scissors, then sit back and enjoy the light show (:
Trustpilot
2 months ago
3 weeks ago


