
DOWNLOAD THE APP


Customer Services
Copyright © 2025 Desertcart Holdings Limited
DOWNLOAD THE APP

🌀 Elevate your desk game with mesmerizing mechanical motion!
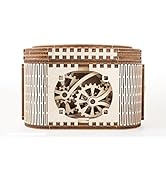
The UGEARS Wooden Marble Run Stepped Hoist is a premium 355-piece 3D wooden puzzle designed for adults and hobbyists. Featuring a unique 3-step mechanical chain hoist, it smoothly elevates marbles through multiple tracks and obstacles without the need for glue or tools. This STEM-focused DIY kit offers modular expansion, detailed instructions, and a captivating blend of engineering and artistry, making it an ideal gift and a sophisticated pastime for puzzle lovers and creative professionals.


| ASIN | B09F3GPSNQ |
| Best Sellers Rank | #158,447 in Toys & Games ( See Top 100 in Toys & Games ) #1,100 in 3-D Puzzles |
| Customer Reviews | 4.4 4.4 out of 5 stars (2,114) |
| Item Weight | 7.1 ounces |
| Item model number | 70157 |
| Manufacturer | UGEARS |
| Manufacturer recommended age | 14 years and up |
| Product Dimensions | 11.61 x 10.63 x 10.83 inches |
S**S
FULL REVIEW!: Chain Hoist Marble run
Today I am reviewing the UGears Chain Hoist Marble Run. I love building marble runs, I find them fascinating. I purchased this one from Amazon; UGears, a Ukrainian company, offers a very large assortment of wooden model kits to choose from, including a number of intriguing Marble run projects. Starting with the 55 page instructions, they were in a book rather than poster-style format, which I prefer. Overall, this was a pretty premium building experience with excellent direction given by the large and detailed instruction booklet. What is very nice is they give you a finished look after each step so you can have the best look at whether you put the parts together right. The parts numbering on the wooden frames was all over the place so UGears very nicely provides a picture of the wood frame at the start of each step, showing where the parts are located on the frame (Show picture). As I mentioned, UGears appears to be a Ukrainian company(Show flag) and they offer a number of languages in the build instructions, including Ukrainian, English, Spanish, German, Japanese, Chinese, Italian, French, Korean, Portuguese and Polish, making this kit accessible to a wide array of people. Assembly This was a very challenging build with a number of tricky constructions to put together like on page 18 where you had to fit the build into a number of different connection points. The parts went together well but were very tight, so I had to take a break sometimes to rest my fingers and hands. I didn’t have any parts break during assembly but there was a large amount of chipping of the parts as I removed them from the frame and when I filed them down to remove the burs. For this kit, I recommend filing the part in the direction of the edge rather than perpendicular to the part. White glue wasn’t necessary during this build due to the tight fit. Operation: There was definitely a break-in period with a whole lot of issues to start out with, but after a few minutes, things improved greatly. They give you TEN 16mm multicolored glass marbles to use in the run. A handle cranks the chain hoist mechanism very smoothly, though there is occasional catching in the mechanism that I will detail more later. The wooden chain rotates and elevates the marbles smoothly to the top of the tower. As the balls get to the top of the run they have three different paths to choose from once released from the chain hoist. First, the marbles can fall down a chute where they finish in a loop-da-loop before heading back into the return path. Second, they can take a route that takes the marble around to the front of the tower, where the marble is handed downward from one pivoting marble holder to the next until it reaches the base platform. Finally, the marbles can land in a mechanism that collects 3 marbles before releasing them to take three short pathways back to the base platform. The marbe run works pretty well, though I had a number of problems. The first problem involved the lifting prongs . The marble can actually get jammed against the inlet hole and the lifting prong . Secondly, the lifting prongs are sometimes caught as they pass through the marble-presenting platform, though fortunately, this doesn’t occur frequently. Assuming they make it past this, sometimes the chain will catch because it doesn’t insert into the sprocket teeth the way they are supposed to. Here is Tip #1: file the teeth of the sprockets before assembly to give them a little bevel so they are more likely to guide themselves into the chain links. In this picture, I show you the area you should file or sand though here’s Tip #2 DO IT BEFORE YOU PUT THE PARTS TOGETHER! At the top of the marble run, I had occasional issues with the marbles getting caught under the lifting prongs because they didn’t start down into the marble run quickly enough (Picture). The next area of problem was the mechanism that chooses the next pathway for the marbles. The marble is supposed to drop down into a catch that then drops the marble down into its next pathway; sometimes, the ball doesn’t readily drop down to where it is supposed to and causes the marbles to back up (Picture). Along the second pathway, I had a backup occur when the handoff mechanism didn’t pass the marble down the way it was supposed to (See picture). Along the third pathway, I had another backup because a swinging wooden piece didn’t catch the marble correctly, so the marble couldn’t go down into the next stage, causing a backup (see picture). Also, along the third pathway a marble chute was too narrow and the marble got lodged in the third most distant chute; this was corrected by tugging on the wooden sides of the chute, giving them a little bit more space (see picture). Occasionally, a marble does get kicked out of the machine with the primary place being the forks on the chain, perhaps filing the inside edge would help the marble seat a little better. So Final Thoughts…: What I liked: The instructions were in a large booklet-style format, mostly clear, and provided a finished look to each step. The instructions showed you where to find the parts on each frame. The parts fit tightly and I didn’t need to use any white glue to hold anything together. The operation of the machine is exciting, with a loop-da-loop and several other novel mechanisms to get the ball down from the top of the run to the base platform. The marble run can be combined with up to 3 other copies of the Chain Hoist Marble run to make a more enormous conglomeration of marble runs and I may try this if I can get the marble run operating more smoothly. They provide you with some parts to make interconnections rather than buying a separate kit. What I didn’t like: The first thing I didn’t like about this kit was the puny amount of wax they give. They do let you know you can use candle wax as long as it isn’t lit! 😂 Sometimes, the instructions didn’t give you the best advice on how to use the wax to lubricate the parts. The instructions didn’t tell you to wax the sides of the gears that rub directly up against the side of the supporting structure. On page 38, there were three almost identical parts. I made an error here as I thought they were the same when, in reality, one of the parts was just a little different, and I ended up putting it in the wrong place and had to take it back apart. The instructions here should have warned you to look out for this variation in the parts. They give you ten marbles, but three are consumed in the build. I would like to have more marbles, though sometimes too many can cause problems. UGears has an excellent YouTube channel showcasing their many different wood projects. Would I do it all over again? You betcha! I like this marble run, and I am looking forward to someday getting at least one, if not three more, to see what they look like combined. If I do, I’ll put it on camera. If UGears sends me free kits, HE asks shamelessly, I’ll do it right away!
B**S
So much fun to build
I’m a 73yr old widow who loves to build dollhouses and discovered UGEARS models. I love marble runs and thought I’d give it a try. The pieces are laser cut, all numbered to match the pictures in the manuals, and easy to punch out. There aren’t any word directions, just pictures, but they are very well done and very easy to understand. What fun to build! Initially, the mechanism had a tendency to stuck in some areas, so I waxed some pieces again and just kept turning the crank and eventually everything ran smoothly. One issue was that the marbles were not heavy enough to trip the mechanisms, so I bought 16mm steel ball bearings which solved that problem. The added weight of the bearings makes everything trip now!
C**R
Very nice kit. Would get 5 stars if it had a motor
Just as background, over the last couple of years I've built 10 or 12 wooden marble runs, including 4 or 5 I'd call very complex. All of them had some issues right out of the box (which seems to be typical), but I got them all working correctly, including one that's been called "the worst marble run on Amazon" (search youtube). I basically needed to re-engineer that one. I've also built a few other 3D wooden models, including ROKR's Space Shuttle, which is very complex. I say all this so you know that any issues I ran into weren't because I don't know what I'm doing. This was my first UGears kit, but likely not my last. Based on the parts count, and the small size of the box, I expected this would be a pretty simple kit, other than maybe building the chain. Well, turns out the chain is one of the easier parts. This kit is surprisingly intricate. Some aspects of assembling it are quite tricky, in part because it's sometimes very hard to get your hands in a location where you can apply firm pressure. But also in part because parts tolerances could be better controlled. Many of the parts fit together Very tightly. So tightly that putting so much pressure on them to seat them risks breaking them. (See my build tips section, below.) OTOH, a few parts are so loose I had to glue them so they'd stay together well enough to go on to the next step. In particular, the "Loop-the-loop" wouldn't stay together at all without glue. For the most part, though, I'd say the quality of this kit is better than most of the made in China runs I've built On the positive side, the instructions are very good. The drawings are clear and well marked as far as what tabs fit in what slots, and in most cases which direction a piece should face. Possibly the best drawings of any marble run kit I've built. Late in the build, where you're attaching an assembly with lots of contact points the drawings aren't quite as clear, but if you line up the parts that are clear the rest becomes obvious. None of the runs I built worked 100% after the initial build. Balls would fall, or fly, off the tracks, or get stuck in places they're supposed to roll. I've had to make as many as 15 or 20 modifications to a couple of kits to get them to work 100%. This kit had only one small problem, where a piece that fit too loosely allowed balls to get stuck. A dab of glue and everything works. Very good design work, UGears. How did / do I like it? Mixed. To me there are two aspects to a marble run. One is the challenge and enjoyment of building it, figuring out what's wrong, and fixing it. (I almost miss not having more issues to fix ;) The second is watching it in action. In part, this run is really cool. The way it traps and releases balls, and opens and closes ball paths is a very cool design. Different than I've seen it done in any other kit. But I hate that it's not motorized. I have to pay enough attention to holding it down, and turning the crank, that it distracts me from watching the balls. It would be very easy for UGears to make a motorized version. I've motorized two other runs, and have a plan to motorize this one. UGears is sending me a couple of extra gears, and I'll add a photos / a video after I get it working. If I can do it, UGears can do it. Otherwise, I'm not thrilled at how much the run flexes when you crank. If it had a solid base, instead of a thin partial perimeter, it would be a lot stiffer. That problem would mostly go away with a proper motor, too. Finally, it needs more marbles. The kit says it comes with 10, but three of them are used as counterweights, so you only have 7 in motion. That's not enough to keep the chain hoist full all the time. Oh, and I think the solid color marbles are kind of dull and boring. Fortunately, glass marbles in all sorts of colors and patterns (16mm or 0.63 inch) are readily available on Amazon and other places, and are cheap. Would I build another UGears marble run? Yes, especially if I can motorize it. It's got some unique features I haven't seen on any of the Chinese brands, the quality is quite good, and building it was an enjoyable challenge. Not the hardest kit I've done, but also not for beginners. The ability to connect 2 or 4 runs together is very cool, too. If you've built other runs and enjoyed them, you'll probably enjoy this one. BUILD TIPS: Note that these kits can vary quite a bit from one box to the next. Tolerances on the laser cuts can be pretty broad. A part that may be too loose on one kit may end up being very tight on another. So don't take the following as gospel. It's one man's experience. YMMV. First there are some videos detailing the entire build process. Search Youtube for videos from "Daniel Builds." The only catch is that Daniel makes a number of mistakes he has to go back and fix later, so watch the whole set before you begin. Or, only go to the videos when you're not clear on something. The kit's directions are generally very good. In those videos, the parts generally go together easily. My kit was different. Almost all the parts fit very tightly, sometimes so tightly I was worried about breaking them. Don't force them: put a little wax on the tabs before inserting them. If that's not enough, sand or file the tabs down a bit. Some of the pieces also fit very tightly in the sheets of parts. Don't try to force them out, or you'll break the small pieces. Use the tool provided on sheet 1 to pry parts out where possible, and push them out where you can't pry them. You can also use a jewelers screwdriver as a pry bar for small parts. Speaking of small parts, be very careful removing them and parts with very thin sections. If they're very hard to push out, use an X-Acto knife to cut some of the places where they connect to the boards, otherwise you WILL break parts. In fact, I state now you WILL break some parts no matter how careful you are. Many times you'll be able to glue them. There are spares for some of the small parts, but they're scattered randomly around the 6 boards. Look for parts labelled with a + sign. If all else fails, you can order replacement parts, but they may ship from Ukraine and take a few weeks to arrive. You may find some parts so loose they don't want to stay together. You can glue these. I suggest using Elmer's School Glue. It's strong enough to hold parts together as you assemble the kit, but weak enough you may be able to pry things apart if you made a mistake. TEST as you go. Don't wait until the build is complete to see if the balls roll where they should, if moving parts move, etc. Make sure marbles roll along their tracks as you complete each subassembly, and as you attach those assemblies to the base, and that parts that should move or rotate actually do so, and smoothly. Any part that rotates, slides or rubs against another part should be polished and given a LIGHT coat of wax, even if the directions don't call it out. Use the sandpaper that comes with the kit to remove any burrs, splinters or rough spots. I got a set of foam manicure files from Amazon to smooth parts. If the part has burrs on it, I start with a 180 grit surface to LIGHTLY remove the burrs, then a 280 grit, then a 1000 grit, and finally a 4000 grit. By then, the parts that rub will be smooth as glass, nearly eliminating friction. Speaking of burrs, there are a bunch of small round pieces that act like bearings, rotating within a round hole. ALL of them had burrs on them after release from the board. It's hard to hold those little pieces to smooth them. Here's a trick: stack as many as will fit on the tool from board 1, then rotate the tool and bearings against the emery board. (see photos) There are multiple places where UGears puts a square peg in a round hole: I use the files to gently round the corners and then wax them, making them rotate more smoothly. A light coat of wax lubricates; too thick a coat of wax can gum up the works. Don't use too much. Oh, I mention this only because I saw a user comment somewhere else about melting the wax: NO, don't melt the wax. Just rub it lightly on the moving parts. Sorry for the length, but I hope this helps people.
E**C
Résultat fidèle à la photo. Amuse les petits comme les grands. Attention,. certains pièces sont difficiles et fragiles à sortir de la planche, il y a un risque de casse. Il faut être minutieux mais le résultat est top.
M**A
The box was a bit damaged, however it looked really good otherwise! Fast delivery as well. Thanks
A**O
sicuramente bello da vedere, molto delicato nel montaggio ,consiglio se sei stanco smetti, alcuni pezzi molto fragili alla fine soddisfazione al massimo.
A**O
Il lavoro di montaggio deve essere meticoloso: gli incastri sono perfetti ma bisogna prestare molta attenzione e agire con molta calma. Il risultato è ottimo! Gli ingranaggi girano bene ed è diventato il passatempo preferito per i miei nipotini. Penso che acquisterò gli altri tre da montare assieme.
F**N
ook top
Trustpilot
2 months ago
3 weeks ago