🖌️ Transform your space into a writable masterpiece—because your ideas deserve a glossy stage!
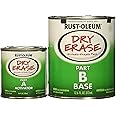
Rust-Oleum's Specialty Dry Erase Brush-On Paint Kit delivers a fast-drying, washable, high-gloss white finish that transforms indoor surfaces into smooth, writable, and erasable canvases. Each kit includes two 16 fl oz cans, covering up to 110 sq ft with two coats, perfect for walls, doors, and creative projects. Easy to apply and clean, it’s the ultimate upgrade for dynamic, reusable message spaces.


| Brand | Rust-Oleum |
| Color | White |
| Finish Type | Gloss |
| Size | 32 Fl Oz (Pack of 2) |
| Item Volume | 946 Milliliters |
| Special Feature | Washable |
| Unit Count | 64.0 Fl Oz |
| Paint Type | Specialty |
| Specific Uses For Product | Interior |
| Surface Recommendation | Walls |
| Indoor/Outdoor Usage | Outdoor, Indoor |
| Item Form | Liquid |
| Included Components | Specialty Paint |
| Age Range (Description) | Adult |
| Is Waterproof | False |
| Model Name | Specialty Dry Erase Kit |
| Package Information | Can |
| Color Code | White |
| Full Cure Time | 1 Hours |
| Coverage | 50 sq ft. |
| Water Resistance Level | Not Water Resistant |
| Global Trade Identification Number | 10020066179141 |
| Manufacturer | Rust-Oleum |
| Dry Time In Hours | 1 |
| Part Number | 241140 - 2 PK |
| Item Weight | 4 pounds |
| Product Dimensions | 9.25 x 4.75 x 8.38 inches |
| Country of Origin | USA |
| Item model number | 241140 - 2 PK |
| Style | Kit |
| Finish | Gloss |
| Item Package Quantity | 1 |
| Number Of Pieces | 2 |
| Special Features | Washable |
| Batteries Required? | No |
S**5
Works great!
I work in intervention and painted a table top last year with some really expensive dry erase paint. It ghosted for no reason and just didn’t wipe very clean. I used cleaner every day on it. It started rubbing off after a year so I bought this rust oleum. It went on nicely. I followed the directions to the T. Unfortunately, as much as I had scrubbed my table prior to the application,(and I had SCRUBBED) there was still dry erase residue on the table which mixed with the paint and made a grey area in the center of my table. I thought I could live with it. Turns out, I couldn’t. So 3 weeks later, I bought more rust oleum and painted it again since it’s still a fraction of the price of the stuff I had used before. this time it was super crisp white! It erases so easily! It still looks completely brand new after a month of school with me and the kids writing on it daily. I haven’t had to use any expo cleaner on it at all. Now, I only use BLACK expo markers on it as I have read that the colored ones will ghost. I have not had any ghosting or discoloration at all. We tend to erase within 5 minutes of writing tho too. I just can’t believe how nicely it erases tho compared to even regular dry erase boards. I’ll definitely be using this brand from now on.
M**K
An author’s best friend - Amazing Value
As the Author of the Kingdom of the Infinity Realm series, I have to do a lot of planning and brain storming for my fiction book series. This white board paint is a life saver. I was able to apply it myself. The final product is great. It’s not as clean of a finish as a separate white board, but it works very well.My wall is grey so I thought I needed 2 coats but I was wrong. I needed 3 coats. This mixture BARELY covered the area I needed with three coats. If you have an application any bigger than that what I have, you’ll need more than one set of this stuff.A tip for you guys: don’t apply it too thick. Do 3 thin coats. If you apply too thick (like I did), it doesn’t dry in 30 minutes like it should, so when you apply the next layer, you end up peeling off the prior one, leaving splotchy areas behind. It’s a mess. So learn from my mistake and apply 3 light coats instead of trying to go for 2 thick ones, and definitely wait the full 30 minutes between coats. This is imperative.
T**Y
It works
I did check to make sure this was a current batch ( other reviewers explained how but you could call the manufacturer to confirm). I ended up putting on 4 thin coats on a 54 sq ft wall. I bought two packs. I got two good coats from each. I used a high density foam roller, like the kind you use to paint cabinet doors. I did try one coat with a standard foam roller, but it put too much product on and I had some runs to deal with. Stick with the cabinet rollers.I did two coats with the first batch in day one. Waited a day and lightly sanded and cleaned before coats 3 and 4. Note it will be tacky after the first coat when you apply the second. And it will take 6-8 hours to be touchable without being tacky. While it's tacky, it will attract dust so be careful if moving drop cloths, vacuuming, etc. some how I got some light dust specks on part of the wall which may have been from moving a drop cloth around.So how does it work? Black dry erase works perfect. Some colors may be harder to remove. Stick with standard dry erase markers. No low order or highlighters. They seem to be harder to remove. I was able to get them off completely though with dry erase cleaner. Use isopropyl alcohol or dry erase cleaner (they are the same) to remove any shadowing. Do not use windex. I suspect in time it will damage the surface.I also noticed after a few extra days it was easier to remove the marker.Again, black works great. Colors, you mileage may vary.Strong odor passes after about an hour. I didn't think it was bad but my complained a little.I'm happy with it so far. Great price. Just don't expect it to be the greatest whiteboard ever. All whiteboards work less well over time. Keep in mind you are painting over drywall. a wall with some texture. It makes using erasers harder to use. I just use a paper towel to get rid of most of the marker and spray what is left.
P**B
Works Perfect if You Follow Instructions
Here's the deal. I was skeptical about purchasing this, but now that I have it installed, it works very well. I have determined that the other users of this product most likely did not follow the instructions, and / or lacked the necessary painting experience. What I did: 1) Mark painting boundaries on wall 2) Tape the boundary with 2" Painter tape 3) Sand the area, wipe(to remove any oils), sand the area and wipe again, check to make sure that the surface is smooth 4) Apply Primer (Even though the drywall was smooth to begin with, we compared this to another area where we did not apply primer, and had better results with primer) 5) Pour activator portion of the paint kit into the larger can (waiting to open the cans not only gives you more time to paint, but also reduces the likelihood of debris such as dust getting in the paint) 6) Stir for 3 minutes 7) Pour into paint tray 8) Paint first coat with 6" foam roller (per directions) 9) Wait half an hour, paint second coat 10) We had enough paint to paint a third coat since we had quite a bit less than the 50 sq. ft it said it could handle, so that's what we did. We compared waiting a day, two days, and three days (like the instructions said) and found that waiting three days yielded noticeably better results than waiting any less. Peel the tape off after waiting at least a day. Notes: I did not get a chance to compare using 3 coats to two, like the instructions hinted at, but I will use 3 next time, even if it means another can, which is not terribly expensive. We did this to see if a tenant in our building would be happy with this, compared to purchasing a full-wall dry erase board for $2,000+. Stirring the paint often will help increase the time before the paint mixture becomes unusable. We are considering painting a piece of Masonite that we will mount on the wall, but want to test a sample first. Hope this helps.
Trustpilot
1 week ago
2 weeks ago