🌞 Power Up Your Security with Solar Magic!
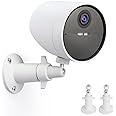
The Shyueda 4W Solar Panel is designed exclusively for the SimpliSafe Outdoor Security Camera, providing a reliable and eco-friendly power source. With an IP65 waterproof rating, it can endure harsh weather conditions while its 360° adjustable mount ensures optimal sunlight exposure. The 13.1ft waterproof charging cable allows for flexible installation, making it a perfect addition to your outdoor security setup.
| Brand | Shyueda |
| Material | Monocrystalline Silicon |
| Item Weight | 0.94 Kilograms |
| Efficiency | High Efficiency |
| Connector Type | MC3, MC4, or Tyco |
| Included Components | Solar Panel and 13.1ft Waterproof Charging Cable |
| Upper Temperature Rating | 1.2E+2 Degrees Fahrenheit |
| Maximum Power | 4 Watts |
| UPC | 756166226005 |
| Manufacturer | Shyueda |
| Part Number | 1 |
| Item Weight | 2.06 pounds |
| Package Dimensions | 9.09 x 6.5 x 5.59 inches |
| Item model number | 1 |
| Size | 2 Pack |
| Color | White |
| Style | Battery |
| Power Source | Battery Powered,Power Adapter |
| Item Package Quantity | 1 |
| Batteries Included? | No |
| Batteries Required? | No |
P**R
Great and perfect for Simplisafe camera.
Okay after reading many reviews on several different panels I decided to try this one. I have a mechanical and engineering background so I will give you some input on the several different panels.There are some panels with built-in battery packs, this one doesn't have one. Why did I choose one without a battery pack? Simply put a year, 2 years or 3 years down the line that built-in battery pack in the solar panel will eventually go bad and not hold a charge. What could be the consequences? The solar panel can't charge the solar panels built in battery pack and may interfere with charging the simplisafe camera's battery. The simplisafe camera's battery will already sustain use of that camera for several weeks if not months, easily. Unless you live in Alaska where you have limited light during certain parts of the year, you don't need a solar panel with a built-in battery pack. This solar panel can recharge the cameras built in battery in as little as a day or two of good sunlight. So there's no need to have a another battery in my opinion. Now assembly went together great.As other have stated to get the angle just right and tightening the knob is a little tricky and it may take you several attempts due to as you do the final tighten down at the very end, it tends to move the angle. But it's not a big deal and it's common with all of these types of ball angle locks. A few attempts and you'll get the right angle.Let's move on to the plug issue. Others have stated it doesn't fit right and they are wrong! Remember this has to be waterproof or water resistant and it's supposed to have a tight seal. There is no extra plastic or nothing. It's all part of the design to keep water out. Line up the plug and as you push it in, move the plug side to side gently while you're pushing it in and it will go in with Just a little effort. Don't try and think more then the engineers and try to re-engineer it by cutting or modifying it! If you have some dielectric grease, it literally looks like clear petroleum jelly You can add just a touch to the plug to make it easier as well as prevent corrosions but I didn't have to do any of that.This panel took my new cameras battery from 75% to 100% in just a few hours. I highly recommend this panel.
G**R
Works great and nice price.
This was easy to setup and works great (even in indirect light.) It keeps the battery topped-up and I am happy with my purchase.If I was to give it one con, it is that the cap that tightens the ball mount has "ears" to make it easier to tighten. If you aren't careful, those can get in the way of the angle you want the solar cell to sit it. I had this issue, but was being lazy, so left it at a bad angle. The solar cell cell is good enough that it still works fine!
D**S
Good value, works well
I used this panel to power a SimpliSafe outside camera Gen 1. It is well made, standoff support is sufficient without sticking out too far. The wiring has a grommet to water resist at the connection with camera. Installed under an eve where it gets afternoon sun. Start with fully charged battery as SimpliSafe recommends. I used camera during the night to drain battery to 85%. It recharged the 15% the next day in less than 30 minutes. Very satisfied
K**Y
Had to modify
They work great BUT are a pain to install for 2 reasons. 1st because of a very long base with screw holes close to the base shaft - they are too close for a drill unless you use a very long extension or a bending extension. 2nd because the micro cord no longer fits SimpliSafe cameras UNLESS you trim off the ridges around the end & gently feather slice a slot on both narrow sides to get past the two tabs in each narrow side of the camera slot. Use an exacto or box cutter & it takes all of 5-minutes.I love the stickers that came for the holes. Applied & drilled 3 starter holes about 1/4" deep (into wood) then used a racheting screw driver to start the screws & finished them with my drill (PZ1 driver) using bending extension. Both cameras show as charging & got 2 panels for less than what SimpliSafe wants for one - worth the time to trim the connection!
R**.
Does Not Need Direct Sun
My garage camera is on the north side of our house so it doesn't get any direct sunlight. The battery was at 82% power when I installed the solar panel a few days ago. During the day the status shows the battery is charging, after dark it shows the percentage of charge and it's been gradually increasing. After sundown tonight it was 87%, I'm guessing it will be up to 100% at sundown sometime next week. Hopefully it will be able to sustain a charge during the winter so I don't have to pull the battery and charge it with the USB plug.The installation was pretty straightforward. I used the enclosed template and punch to mark and start the mounting bracket holes. I set the angle and locked it in while on the ground, so I didn't have to mess with it on the ladder. The fascia board was pretty dense wood, so it took a while to tighten the screws then screw the panel onto the mounting bracket. Used a little dielectric grease on the charging cable plug and it inserted cleanly with minimal effort. No need to make the hole any bigger. Put a little drip loop in the charging cable and tidied things up with a zip tie. There's plenty of cable, so next time I'm on a ladder I'll make the loop a little bigger.So far, so good. It will be interesting to see how it does this winter. It doesn't get too cold in N. Virginia, but we do lose several hours of sunlight.
K**H
Works well!
Works well! Easy to install and fits Simplisafe camera well. Keeps my cameras fully charged on days with lots of sun. I would buy them again.
D**A
Didn't Even Last 4 Months
Worked great for first 3 and a half months. Then just quit working. Went through the troubleshooting steps and that didn't help. I sent message to seller and received NO response after 5 days - so I'm leaving this review to warn others about the product and seller.
T**Y
Excellent solar chargers
These panels are very easy to install. Connection to the camera is perfect. So far, they are doing the job and keeping the cameras charged all the time.
Trustpilot
1 week ago
4 days ago