


⚡ Elevate your workspace with power and precision!
The BiMi Heavy Duty Class 4 9" Gas Lift is a robust, certified office chair replacement part designed to support up to 160kg. Featuring a 9-inch casing that extends to 15 inches, it offers smooth height adjustment with tapered diameters (50mm base, 28mm seat) for perfect fitment. Finished in sleek black metal, it combines durability with contemporary style, making it an essential upgrade for any professional workspace.


| ASIN | B004NLZU8E |
| Age Range Description | Adult |
| Arm Style | Armless |
| Assembly Instructions Description | The product comes with assembly instructions. |
| Back Style | Solid Back |
| Best Sellers Rank | 537,988 in Home & Kitchen ( See Top 100 in Home & Kitchen ) 1,126 in Desk Chairs |
| Brand Name | BiMi |
| Colour | Black |
| Cushion Style | Simple |
| Customer Reviews | 4.4 4.4 out of 5 stars (959) |
| Finish Type | Unfinished |
| Form Factor | Four-legged rocking |
| Frame Material Type | Metal |
| Furniture Base Movement | Rock |
| Furniture Finish | Natural |
| Included Components | no components included |
| Indoor Outdoor Usage | Indoor |
| Is Assembly Required? | Yes |
| Is Customizable? | No |
| Is Foldable | No |
| Item Depth | 1.97 inches |
| Item Dimensions | 5 x 23.5 x 23 centimetres |
| Item Dimensions D x W x H | 38.1D x 22.9W x 38.1H centimetres |
| Item Shape | Irregular |
| Item Weight | 1.02 Kilograms |
| Leg Style | Tapered |
| Manufacturer Part Number | CHRG-22209-BLK |
| Material Type | Metal |
| Maximum Weight Recommendation | 160 Kilograms |
| Model Name | 50166 |
| Model Number | 50166 |
| Pattern | Solid |
| Product Care Instructions | Wipe Clean |
| Reclining Position Count | 1 |
| Recommended Uses For Product | Office |
| Room Type | Office |
| Seat Height | 15 Inches |
| Seat Material Type | Metal |
| Size | Medium (M) |
| Sleeping Bag Filling Material | Plastic |
| Special Features | Adjustable Height |
| Style Name | Contemporary |
| Surface Recommendation | Hard Floor |
| Tilting | No |
| Unit Count | 1.0 count |
J**N
Easy to fit, works well. Cheap and good. Recommended. You may need some tools and help to remove your old gas lift.
Ok, a gas lift for your office chair isn't glamorous, or trendy, but when my office chair started to slowly sink each time I sat on it, I knew the hunt was on. After measuring the extended length and the upper and lower diameters, a quick search on Amazon threw up plenty of results. I selected this one, mainly because it was fulfilled by Amazon and I get free delivery with Prime. Removing old gas lift: This is a little less straightforward. In the end I placed my chair upside down on the edge of a table ( seat cushion on the table ), and then used a small lump hammer to knock off the wheeled base. Next I had to unscrew the seat cushion to expose the top of the old gas lift. Using an old screwdriver and a hammer, I was able to knock the old gas lift out. Fitting the new gas lift is much easier, simply placing it thicker bit first into the wheeled base, and then placing the chair on top. Job done. I feel vindicated for not taking out the over-priced "warranty" from Staples. They wanted £40 to cover repairs! This replacement gas lift at less than £10 saved me that expense.
J**N
Still going strong after 2 years, but I initially had a lot of difficulty fitting it - see instructions in my review
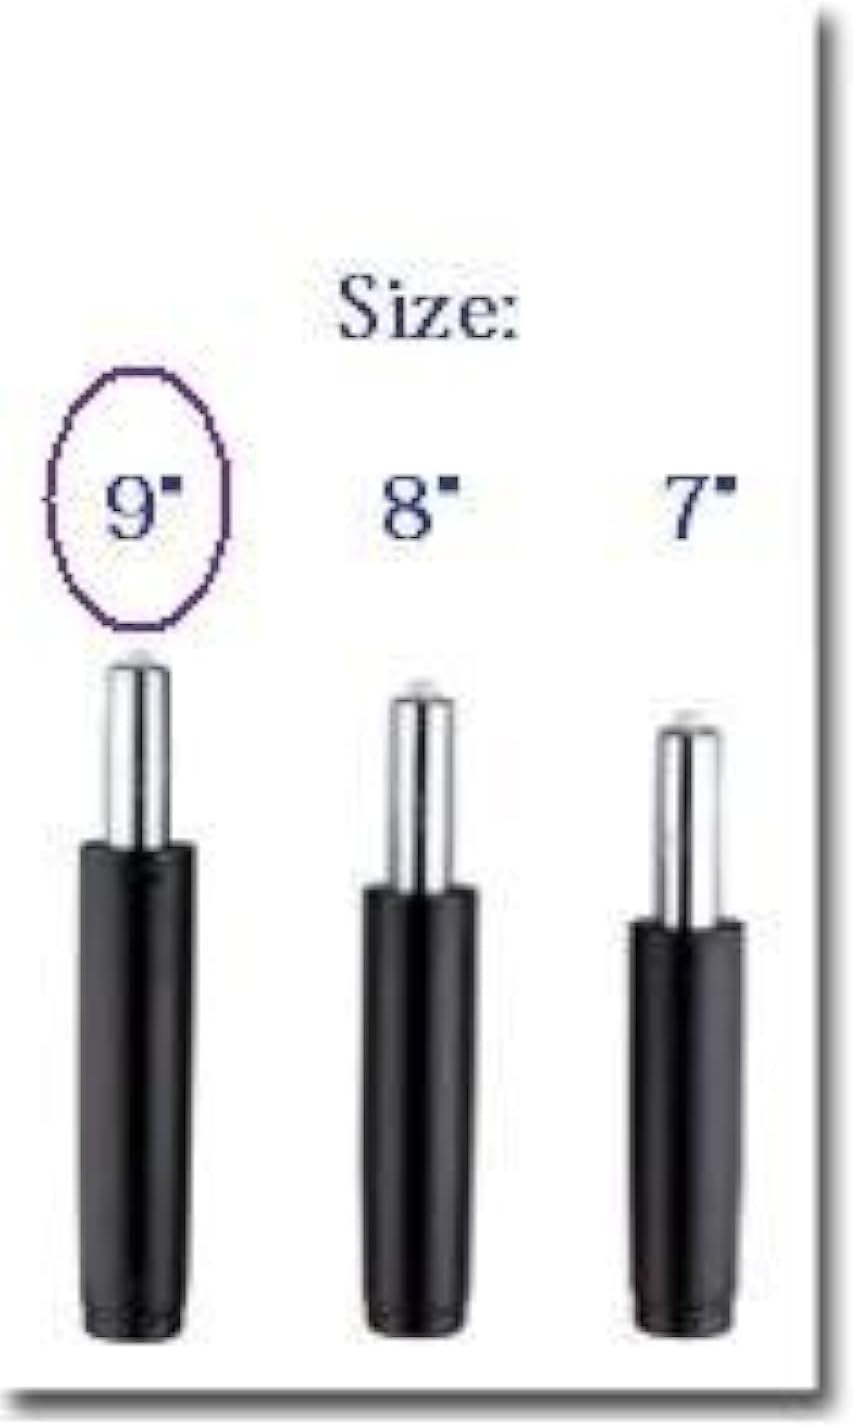
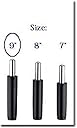
Update Aug 2018: We've about 5 of these in the office for over 2 years now. None have failed, so highly recommended. This gas lift seems fine, but I've only had it fitted for a few weeks so far. I'll update this review in a few months if it's still working fine. Mine was purchased from seller 'BiMi' - I suspect the quality may well vary depending on the seller. It's important to check you get the right length; this one is 9"; the part to measure is the length of the main black body of the lift - don't forget that some of it is hidden inside the star base of the chair. It doesn't have to be an absolutely perfect match length wise; slight differences just mean the chair minimum/maximum extensions will be slightly higher or lower. I had a lot of trouble fitting this; the supplied instructions were useless for me, and it took a number of attempts (and a lot of watching useless youtube videos where everything had been pre-loosened) to figure out how to do this. I've now done it for 5 chairs so I feel this is a approach that should work for other people too. You need: penetrating oil (I used WD-40 Specialist Penetrant Spray 400ml ), floor coverings, mole wrench/locking pliers (I used Stanley Locking Pliers 9-inch Curved Jaw ), lump hammer, blocks of wood, ear defenders, safety goggles Remember that these gas lifts can be dangerous due to the compressed gas inside. Wear goggles etc and take extreme care when doing the steps marked [caution]. Steps are: 1. Remove any arms from the chair 2. Cover up the floor/carpet; the next steps can get messy with little parts covered in oil/many years of dirt falling out 3. Remove clip at bottom of gas lift and separate base vs rest of chair 4. Place chair upside down on a desk/workbench 5. Give piston a few whacks against each side with a hammer/mallet [caution] 6. Position chair base upside down 7. Add penetrating oil around the both piston in the chair and the lift in the base 8. Wait for the penetrating oil to do it's work (at least a few minutes; I left some of them overnight and gave more than one dose of oil) 9. Tighten on mole wrench onto piston, tap mole wrench once or twice with hammer (attempting to rotate the piston), remove piston with rotating action [caution] 10 .Support base upside down on some blocks of wood, so there is some gap between the lift body and the floor. You might think you can manage without this step. I certainly thought that. My actual experience is you really do need to firmly support the base. 11. Place block of wood over bottom of the gas lift. If the lift doesn't protrude through the chair base, you may need to add a socket or something as a spacer. 12. Hit block of wood with a lump hammer, hard, several times. Now onto reassembling; fairly obvious: 13. Make sure to put any decorative column onto the piston. 14. Insert piston into chair 15. Insert gas lift/chair into base 16. Sit on chair to force both ends fully in (just normal sitting is fine). 17. Verify gas lift works
T**I
Superb value, needs very slight mod to fit.
I have been looking for a good replacement gas strut for my Steelcase Leap chair for some time as the original had started to let me down slowly during the day, so I had to keep lifting the seat to get comfortable. I saw this strut advertised and for the price I thought I would give it a try as it wasn't a huge amount to lose if it didn't fit. The biggest problem I had was getting the old strut off but eventually managed with my son's help, fitting the new strut was a piece of cake, the only problem for me was that on my particular Steelcase Leap chair, the small plastic 'pip' on the top of the gas strut (that makes it go up and down) was a little too long, meaning the chair would not stay up. All I did was gently file a couple of millimetres off the top of the plastic pip until I could sit on the chair and it would remain in position. At first the operation was a little 'sticky', but it soon settled down and I have to say I am extremely pleased with my purchase, I no longer get that 'sinking feeling' and the chair is now much smoother and stays in position beautifully. A very good purchase and an absolute bargain in my eyes. All you need is a small file and a little patience, and a visit to YouTube to see how to change it. Excellent.
L**N
Ya estaba pensando en renovar mi sillón de director por uno nuevo, ya que el pistón no aguantaba y se bajaba constantemente, y me daba mucha rabia porque el sillón sólo tenía un año y medio y lo tenía bastante cuidado... pero entonces descubrí que BiMi vendía el pistón por separado y eso ha sido mi salvación... ahora mi sillón vuelve a funcionar perfectamente y lo puedo aprovechar algún tiempo más... y lo más importante, habiendo gastado poco dinero en comparación con lo que cuesta un sillón nuevo... así que estoy muy contento... Montarlo es muy sencillo... pero lo más difícil es desmontar el viejo, que suele estar bastante encajado en la base y en la plataforma de la palanca... pero se consigue con un poco de maña y de paciencia... además hay algunos vídeos por la red que te explican cómo hacerlo... ;-)
R**D
It greats make as ll the difference in the world
F**T
produit parfait qui vous évitera le rachat d'un fauteuil!! Beaucoup de tutos sur internet pour réaliser le remplacement - cela m'a pris moins de 30 minutes. Très utile!
K**F
خامه جيده
D**O
Letta una recensione ho acquistato il pistone di una misura in più e ho fatto bene. Il prodotto si presenta con la parte finale più lunga ma non tocca a terra; l'uso della leva è diverso, la devo tirare più a fondo ma funziona bene. Il pistone non scende da solo, rispetto a quello sostituto ed è più rigido ma non mi da noie particolari (questa cosa è comunque soggettiva). In finale è un buon prodotto.
Trustpilot
2 weeks ago
3 weeks ago