


Buy anything from 5,000+ international stores. One checkout price. No surprise fees. Join 2M+ shoppers on Desertcart.
Desertcart purchases this item on your behalf and handles shipping, customs, and support to Vietnam.
๐ Elevate your 3D printing game with silent power and smart control!
The Teyleten Robot TMC2209 V1.2 Stepper Motor Driver pack of 5 offers ultra-quiet operation, advanced heat dissipation, and sensorless feedback support. Compatible with SKR V1.4 Turbo and SKR 2 32-bit control boards, it supports up to 2.5A current and features easy UART module integration, making it an essential upgrade for professional-grade 3D printing performance.
| ASIN | B09BK57KNY |
| Brand | Teyleten Robot |
| Brand Name | Teyleten Robot |
| Customer Reviews | 4.4 out of 5 stars 101 Reviews |
| Item Weight | 0.03 Kilograms |
| Item weight | 0.03 Kilograms |
| Manufacturer | Teyleten Robot |
| Model | G78-1 |
| Number of Items | 5 |
| Part Number | G78-1 |
| UPC | 755454774471 |
| Voltage | 5.5 Volts |
B**R
Works like a charm
Great product
T**L
Needs few touchups before usage
The heatsink overlaps the pins with a chance of shorting if the adhesive deteriorates, use nail polish on the pins before applying the heatsink, the 5th pin is from the wrong order for UART if you follow the picture above, it's the 4th by default! Pins are both skewed not parallel. Works plug and play on RAMPS 1.4 with Klipper otherwise. You can also invert the VMOT pin to the other side for external 27v power supply for full torque with StealthChop (silent mode)
M**Y
So far so good.
Got these for my Anycubic Mega S and boy what a difference from the original drivers. I followed the advice from the other review below and from the internet, working so far doing a test print as we speak we shall see. Beyond that works great, so far I recommend!
J**.
Useful, very...!
Great to have a few of these for when you bleep an axis controller. The simplicity of pulling out the old one and slipping in one of these on my SKR 1.4 is great. You don't have to clip any pins for these at least in my case. They do get hot so please wait a few minutes after powering down your printer before touching them or use a hot mit. Also you should use a fan to help offset the heat build while in use. This multi pack is a great value to just keep in your emergency replacement kit for any 3d printer that uses replaceable driver chips.
A**C
Good Stepper Drivers at a Great Price
I was a little hesitant to order these as they were pretty significantly cheaper than some of the more known brands and had no reviews, but decided to take a chance and I'm glad I did. As seen in the picture, the chip is a TMC2209, not a 2208 like I feared I might get for the price. The board is mostly unlabeled, but the pinout is in the pictures in the product listing and the enable pin is labeled. I currently have them running in standalone mode on a 3d printer (AnyCubic Chiron). I did adjust the Vref before using them as it was not at the value I needed out of the package. The heatsink is nice and large and they really quiet down the printer. I swapped them in for some A4988 drivers and I did have to reverse the motor direction in firmware, but I've also read you can just reverse the motor wire connection also. It is important to note that compared to an A4988, the enable pin needs to. E lined up in the same place, which makes it look like the drivers are reversed compared to the old ones. Unfortunately none of my other printers have removable stepper drivers, but I wouldn't hesitate to buy more of them if I ever blow a driver.
S**R
ATTENTION ANYCUBIC MEGA X USERS - THIS REVIEW IS FOR YOU
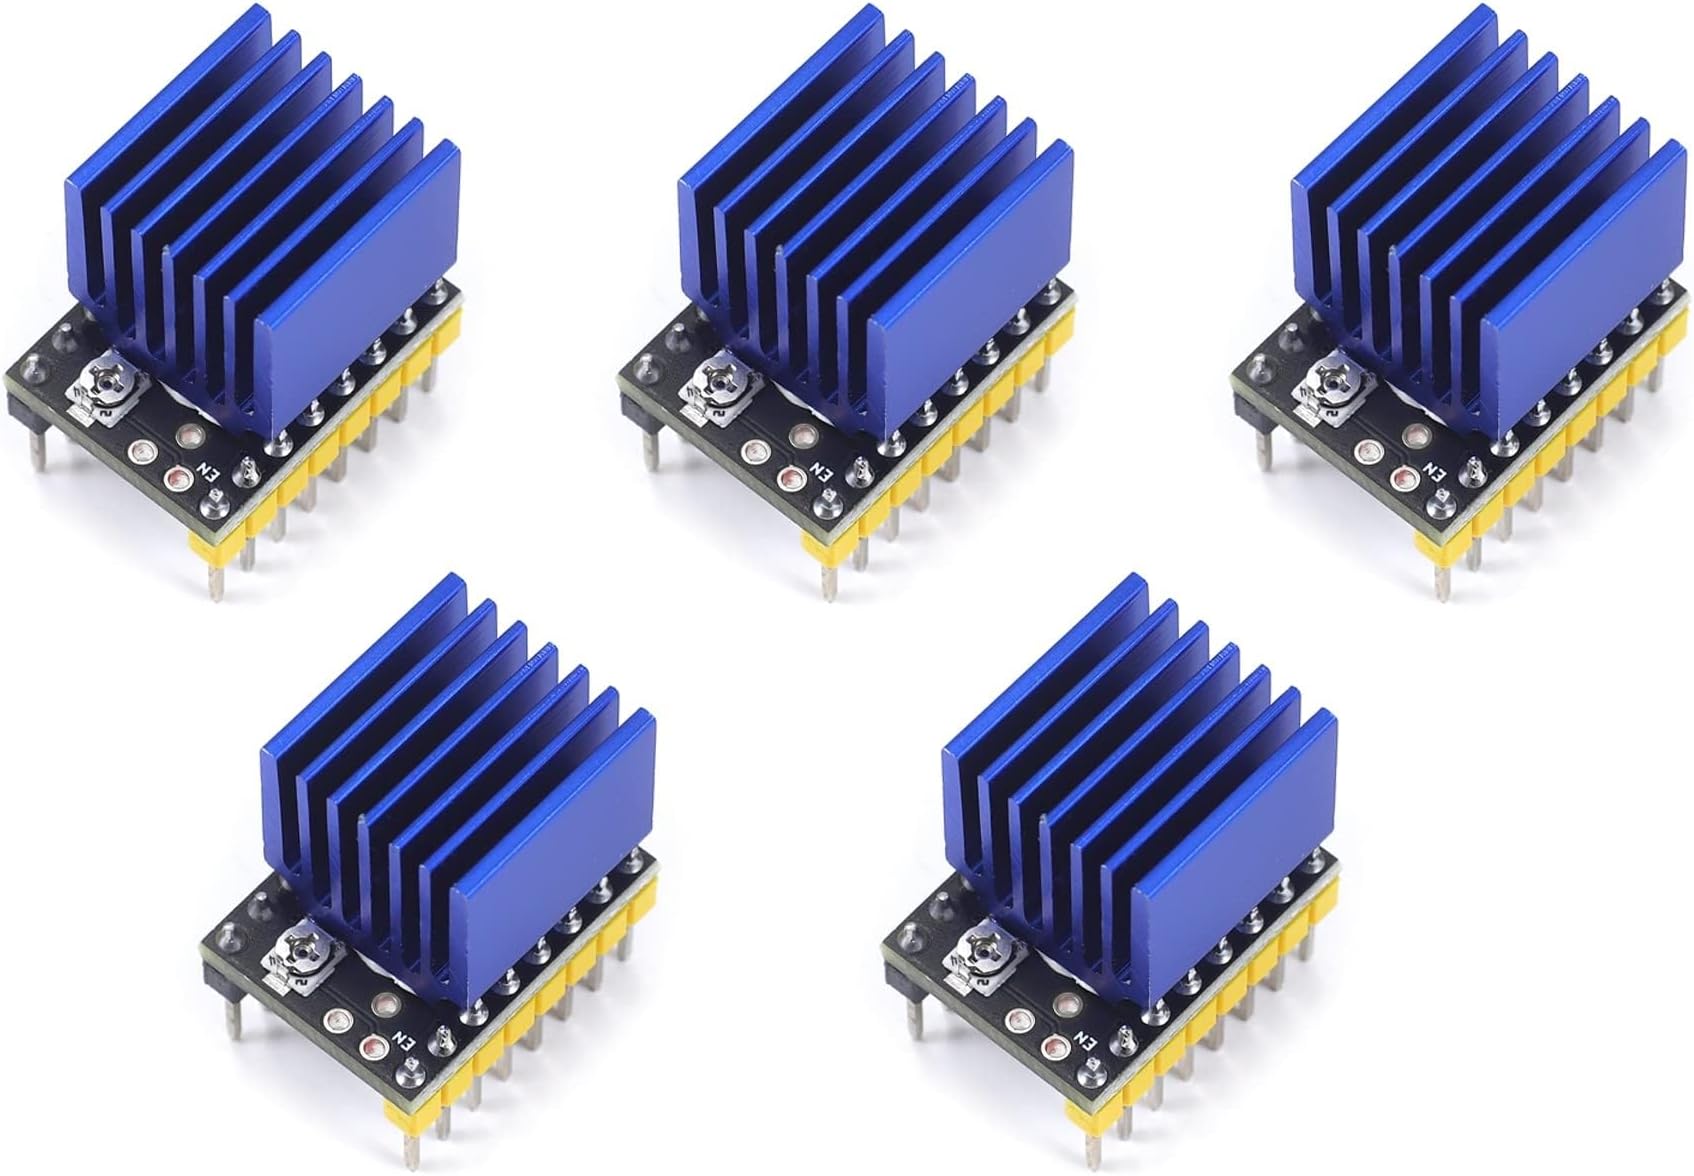
I bought these drivers as a swap in for my ANYCUBIC Mega X's stock stepper drivers because the stock drivers are super loud. Like many 3D printing hobbyist, I YouTubed how to install them but these general videos will not help you with these specific drivers beyond a certain point. Key points that will remain the same for those videos and these drivers: 1) You have to disconnect your stepper motors from the board, pull the plastic input housing off the pins and flip it 180 degrees. Reinsert this housing on the pins. Then flip your cables over and plug them in like that. 2) When adjusting VREF with a multimeter on each driver's potentiometer, each one should be between 1.1V and 1.2V. I did 1.1V for every stepper except the extruder (E0). For that one, I did 1.2V based off of a wealth of research. Okay, that's where the similarities between these drivers and the instructional videos end. The product description says UART or Direct Step are both driver setting options. This is not the case if you have an ANYCUBIC Trigorilla board in your printer because the ability to adjust steps manually does not exist on those boards and is defaulted to 16 steps. So what does that mean? It means if you install them as is in UART mode, your axises will be a hot mess express. My Y axis kept going all the way forward or backwards and just grinding there. My X axis wouldn't move at all. Only my Z axis worked correctly. I scoured forums, videos, and Facebook groups for help and finally found someone who was patient enough to help me figure this out. Basically, to turn UART off and set the driver to direct step mode (which is the mode you need for these printers that use Trigorilla boards) you need to bend 3 pins all the way sideways so they do not insert into the board. (please see attached photos for reference). If you look at one of these 2209 drivers straight on with the 3 copper circles being the top (yellow pins should be on the right), you're going to bend flat out to the side the 3rd, 4th, and 5th pins on the right side. This turns UART off and converts this into a direct step driver. Now you can carry on without the 5+ hours of troubleshooting and confusion that I endured. This process works fine with stock firmware and Knutwurst. I don't run Octoprint or Klipper, but I'd imagine it'd work for those too. Once I'd done this to all 5 stepper motors and turned the printer off and back on, the axises corrected themselves and now all home appropriately with no grinding. Happy Printing!
Trustpilot
1 week ago
2 weeks ago