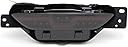
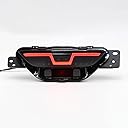
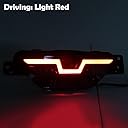
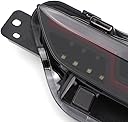
I added this bumber brake light along with other lights in the reflector positions on both side, followed YouTube video guy who does not remove the bumber and made this method work, do have to be careful, I added tape to protect paint, had drill ready to increase size of hole in rubber for wire and found to very small rubber plugs on each side, removed and fished a ln extra wire from inside the trunk down and taped the brake light wire to this to pull back into trunk, took the time to cut the rubber plugs so the wire was held in place and sealed, I ran the additional center bumber wire thru an extra hole to the right of the main wiring harness and drilled a hole in the center to feed the brake wire, then fed it the the right tail light side, had already exposed the wires, trimmed back and followed the wiring from the YouTube video, just on the 3rd center brake light test, since the yellow wire was the parking and the white wire is backup light that I also didn’t use since is more complicated to wire, just using as a brake light with plans to later run a wire into the hatch or tailgate to connect the white back up light, he also didn’t connect and after installing all three lights, wiring and testing it took me a few hours so was happy with extra parking and brake lights, more instructions could be included but I wrote down the color of wires in the car and what color to connect before starting the side reflector lights are the easiest and I opted to stripe the wires on the right side where was adding two wires to each of the car wires and tape vs on YouTube he uses some quick connectors that did work on the passenger side when only adding one wire to each but not when adding two wires. If you are not familiar with figuring out wiring or have the correct tools, hum, but would be expensive for a shop to do the work based on the time, so weigh your options, I am determined as a DYI to figure things out, but for sure test each light to make sure the parking and brake lights work with a quick connection before closing back up the job assuming you did the wiring correctly, I had followed the wiring on the sellers page to see they had the white and yellow wired mixed at least on the pg and light I looked at, the center bumber light has 4 wires while the two reflector side lights only have three.