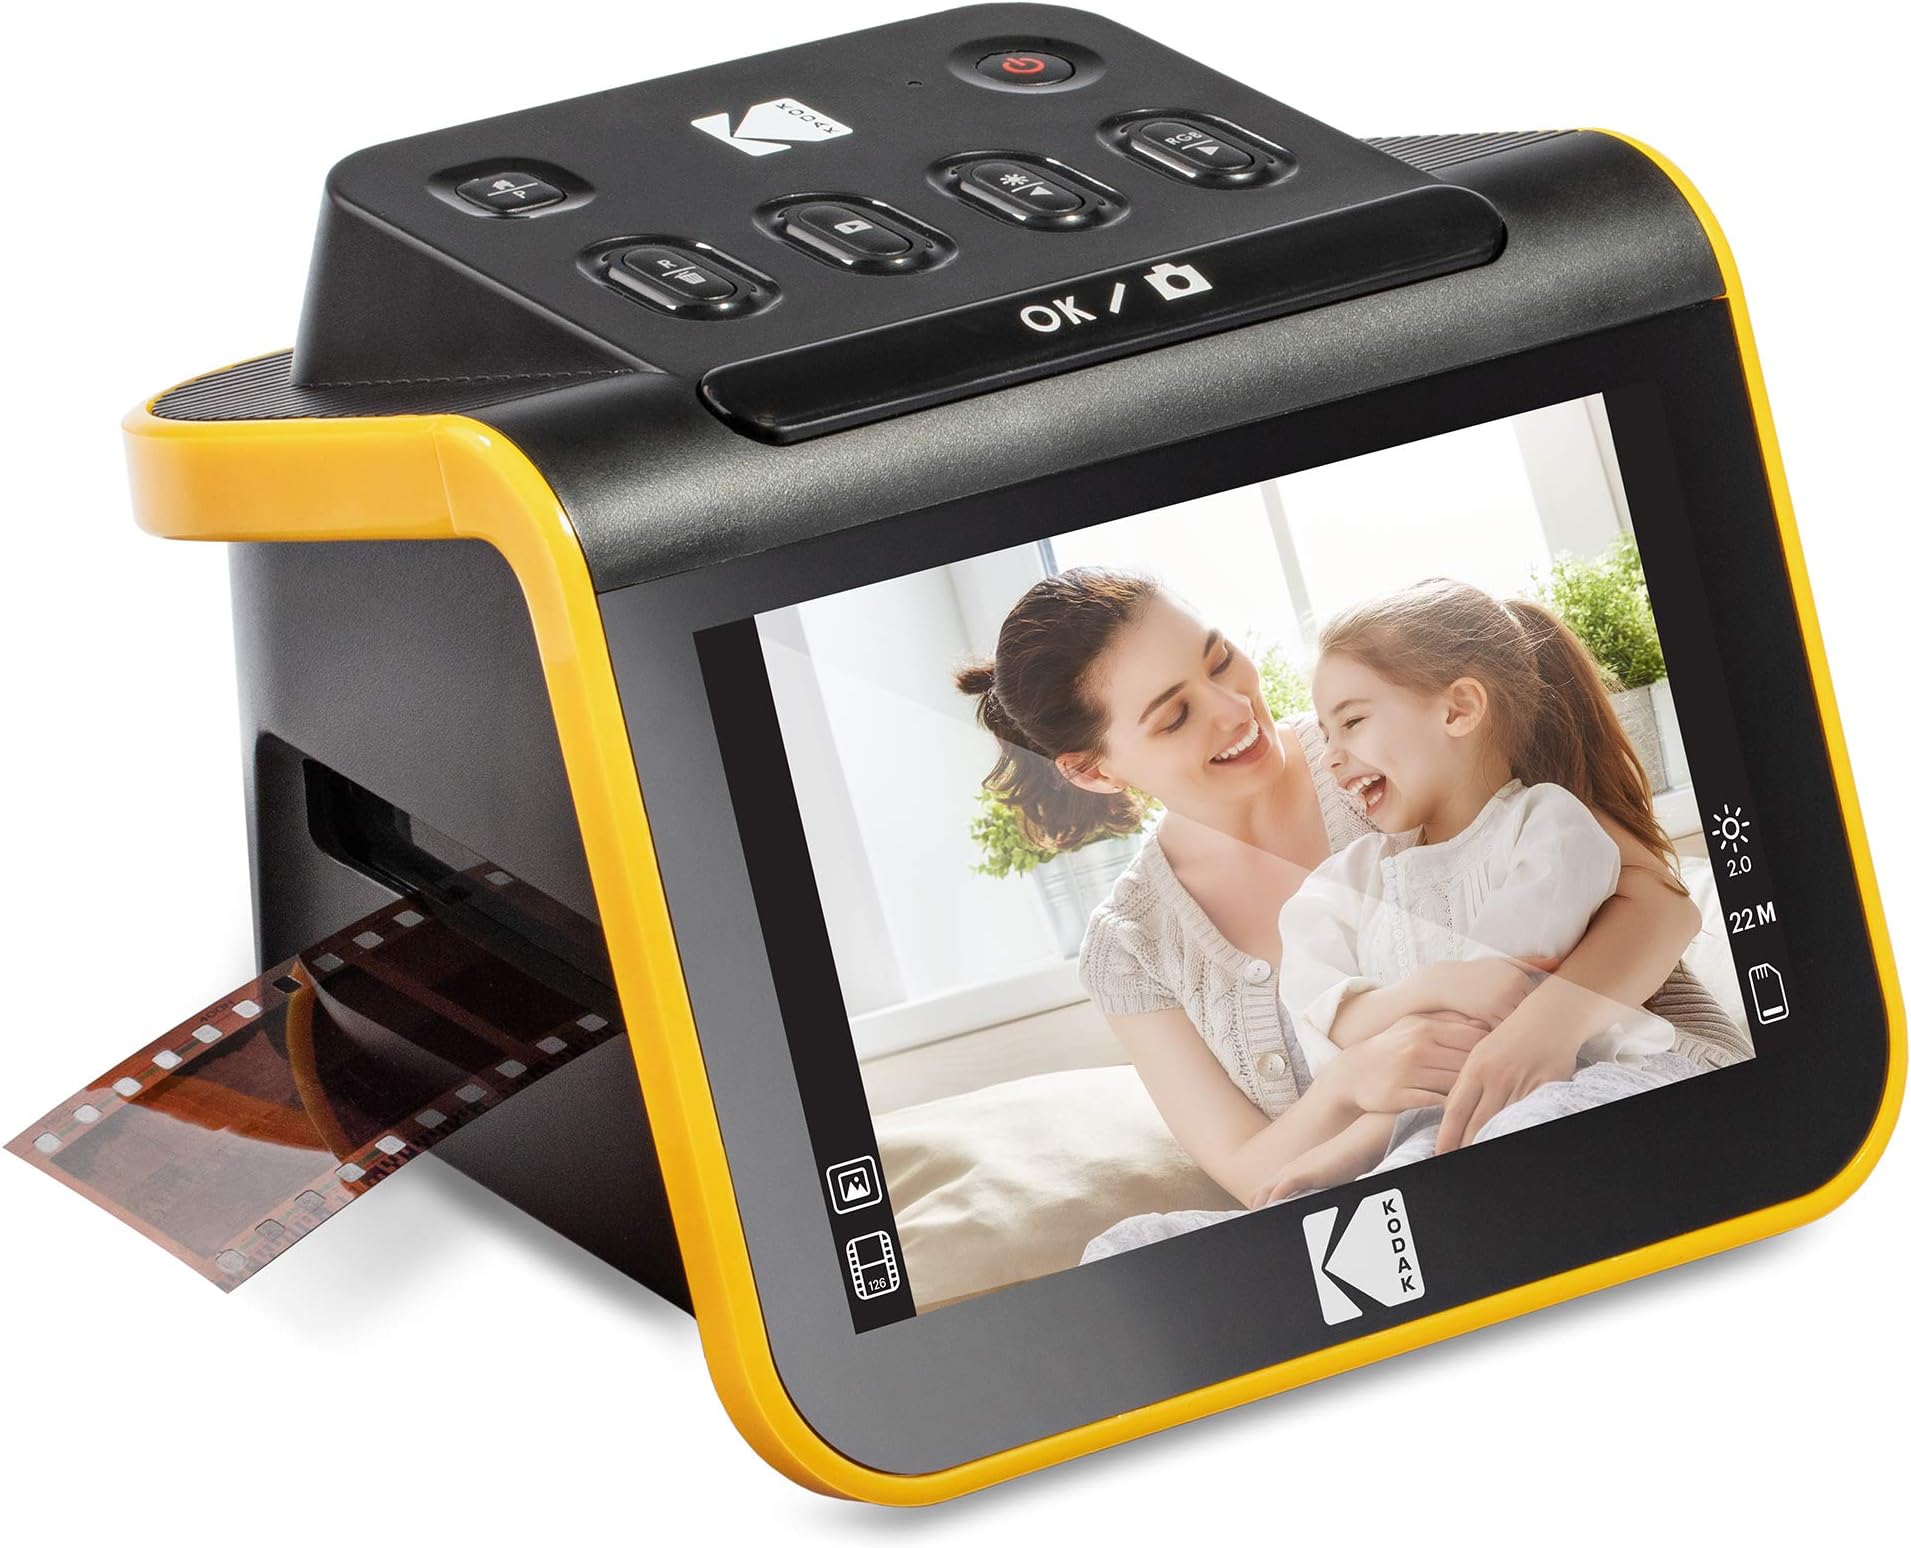

🎞️ Preserve the past, pixel-perfect and hassle-free!
The KODAK Slide N SCAN is a versatile film and slide scanner featuring a sharp 5” LCD screen and 22MP resolution, designed to digitize 135, 126, and 110 film formats quickly. It supports SD/SDHC cards up to 32GB, offers easy one-touch editing, and includes adapters and cleaning tools, making it the ultimate tool for preserving vintage photo collections with professional-quality results.


| ASIN | B084NVRHYQ |
| Batteries | 1 Nonstandard Battery batteries required. |
| Best Sellers Rank | #1,964 in Office Products ( See Top 100 in Office Products ) #1 in Slide & Negative Scanners |
| Customer Reviews | 4.4 4.4 out of 5 stars (12,108) |
| Date First Available | February 10, 2020 |
| Item Weight | 1 pounds |
| Item model number | RODFS50 |
| Manufacturer | Kodak |
| Product Dimensions | 5.27 x 5.35 x 3.74 inches |
K**A
Exactlkt what i neede at a reasonable price, great quality, durable
Bought this to digitize 120 years of family photos. Once you get use to how it works, it's a breeze to use. Can do 126 negative, 35mm negatives and slides. Scanned over 5000 slides and it never failed. Image quality was as close to a picture as you can get, was even able to lighten a few to increase viewing, colors are clear and concise. Great value if you want to scan negatives and slides. Does take a bit of time to get use to using, but then it simple.
A**C
Perfect for family photos, good quality and fun to use
I'm so happy with this little device! As soon as it arrived I tested a 35mm color negative. It's really simple to use, as soon as you set up the scanner and slide in the negative, you can see the image immediately on the screen. It's so enjoyable and quick and the quality exceeded my expectations. You do need to buy a 32GB SD card or 32GB SDHC card. It will not work with larger GB or with SDXC cards. Setup: Plug in the USB-C/USB cable (provided) into the scanner. USB-C side goes into the scanner, and the USB side goes into to your PC or to a wall adapter. Insert the SD card in the back of the scanner (right next to the USB-C slot). Open the hinged slide holder and insert the adapter for 135mm, 126mm or 110mm depending on what film you are using, and then snap it closed again. The manual shows you how to align the adapter inside the hinged holder. If you are scanning slides you won't need an adapter, you will just need the slide holder. Insert the slide holder into the slot on the right side of the scanner. The arrow on the slide holder should be pointing toward the scanner. About an inch will still be visible, sticking out of the slot. This is where you insert the film. How to use: Press the power button (it must be plugged in to PC or wall using the USB cable to power on). Press the large OK button on the front to select film type. Use right/left arrows on the top of the machine to select film type and then click OK. Select the film size and click OK. Make sure your film is right side up, and slide the negative into the slide holder on the right side of the scanner. Smile when you see your image on the screen! You will need to adjust the film so that the image is centered on the scanner, and then press the large OK button again. Slide the film further in until you can see the next image. Press OK to scan. Once you can't push the film in any further, you can insert the next piece of film and it will push the first one through and out the left side. I found a few times where the film was curved and wouldn't go in past the first image. If this happens you can remove the slide holder from the scanner, insert the film into the holder while gently pressing down on the first image. It should slide through and you can reinsert the holder into the scanner with film already in it. It takes about 2 seconds for the image to scan. Transferring photos to your PC. You have 2 options - you can remove the SD card and insert it directly into your laptop/PC if it has a slot. If not you can connect the scanner to your PC using the USB cable (provided) while the SD card is still in the scanner. This will bring up a USB device on your PC and you can see all of the images. They are given file names based on the order you scan them. I have scanned over 1,000 images on the SD card so far. Quality: The quality of the images is better than I expected. For sure up to 8x10 prints would be high quality, I'm attaching a scanned image so you can see. Also please note in the scanned image I didn't center the negative properly. If you are moving too quickly through the images this can happen, so it's good to view the images periodically in case you need to rescan anything. Make sure you keep the film dust free, and also make sure the scanner is dust free. It comes with a cleaning brush that can be inserted into the slot where the slide holder goes to clean out dust. Do this with the soft part of the brush facing down. I didn't do this at first and some of the images ended up with some marks from the dust.
C**P
Quick, easy to use, screen freezes after transferring pictures to my computer.
This product was very easy and simple to use. I had a bunch of slides I got from my parents house with pictures of my dad’s two years in Italy from 1977 and it digitized them like a dream and I was able to digitize about 500 slides in a few hours. It was a fast and easy process. The scanner was very light and small and feels cheap, but works well. The quality of the pictures were really good too. I gave the product 4 stars because every time I transferred the pictures to my computer, I would have to turn off the scanner and turn it back on to keep scanning (I was scanning in batches to keep better track of the order of pictures). When I was done transferring the pictures, I’d push the film button again on the scanner and the screen would freeze up. Turning it off and then on again fixed the problem. I don’t know off it’s a product problem or a something is wrong with my specific scanner
J**O
So easy, anyone can use it. And the results are fantastic.
Our family has a lot of slides from the 1960's and later that need to be converted to a digital format. Instead of sending them off and paying someone else, I purchased this scanner to do it myself. Setup was super easy. Just put in an SD card and plug in the power cord. You can use a USB wall charger but I plugged into my laptop and that worked out well. Once you power it on, you select what you're scanning, the film size and it's ready. There are several adapters which were great because some of the slides had come out of their mounts and had to be scanned separately. Other slides were 110 slides (instead of the standard 135 slides). No issues. You slide in the slides and the scanner shows you an immediate preview. Screen is about the size of my iPhone 11 with good color and clarity. Once the preview is the way you want, you hit the button and it is scanned. There are options to adjust color and some other things but I haven't had to use those yet. Once the pictures are scanned and if you have plugged into a laptop then you just hit the home button and select the USB upload option and a window will pop up on your laptop (Windows laptop is what I used) to upload the scans. You get the select the folder then the scans are uploaded. As you scan more slides and upload them, it gives you the option to just upload what has been scanned since the last upload. You could also take out the SD card and copy those but that's just an extra step. The scans are really good quality. Of course, it's dependent on the quality of the slides. I've had to clean several to get good scans but being able to see them in the preview makes that quick and easy. Overall, this is a quality scanner that requires almost no technical knowledge to use effectively. The instructions are very good and on the Amazon listing there is a very good video showing how it works. And given what it costs to have slides and negatives converted, it is a good deal also. I am very pleased with the purchase. Also, a shoutout to the merchant. They got my order to me multiple days faster than I expected, which I really appreciated. Package was well protected but no wasted packaging. Thanks to DBROTH!
L**I
ممتاز
T**Y
great product i can now get old photos from negatives
F**N
Ottimo per digitalizzare grandi collezioni domestiche – scansione rapida e risultati eccellenti Ho utilizzato questo scanner per convertire in digitale una collezione di circa 2000 diapositive in meno di dieci giorni, e il risultato ha superato le aspettative. 📌 In sintesi: È uno strumento eccellente per chi vuole digitalizzare un archivio personale con risultati più che buoni e in tempi molto brevi. Peccato per la gestione un po’ macchinosa dei file tramite SD card, ma nel complesso rimane un ottimo scanner consumer per diapositive tra quelli disponibili oggi sul mercato. ✅ PRO Scansione velocissima: il flusso di lavoro è intuitivo, ed è possibile digitalizzare centinaia di diapositive al giorno senza fatica una volta abituatisi ai movimenti. Buona resa dell'immagine: le impostazioni disponibili (esposizione, colore, luminosità) permettono spesso di ottenere uno scatto "finale" già soddisfacente, senza necessità di post-produzione. Adatto a diversi formati: i supporti inclusi sono pratici e compatibili con diapositive e negativi praticamente di qualsiasi formato - controllate il manuale prima di acquistare -, rendendolo perfetto per digitalizzare collezioni di famiglia. Qualità dell’immagine sorprendente considerando il prezzo e la natura consumer del prodotto. ⚠️ CONTRO Non si può salvare direttamente su computer, nonostante il dispositivo sia alimentato via USB: serve una scheda SD (non inclusa), da acquistare a parte. Supporta solo schede SD di dimensioni limitate (max 32GB) e di una categoria specifica, ad oggi non sempre facili da trovare.
L**S
Me está siendo muy útil para recuperar imágenes de hace 60 años que se encuentran en diapositivas de distintos tamaños. Es fácil de utilizar y el resultado es muy bueno sin perder de vista algunas cuestiones: - Sus 22 megapíxels obtienen todo lo que pueden de una diapositiva que como máximo medirá 3,5x2,3 cm, por lo que no podemos compararlo con los 22 Mpx de una cámara que los captura de todo lo que esté al alcance de su objetivo. - En ese sentido, al igual que la lente de una cámara ha de estar limpia para sacarle todo el partido, la diapositiva o el negativo han de encontrarse en muy buena condición para obtener todo lo que se pueda de ellos. Algunas de las mías están bastante mal y los milagros no existen aquí. - Para mejorar los resultados y subsanar las deficiencias de los negativos o diapositivas hay que utilizar un programa de procesado como es el caso de Photoshop. Si no lo manejas mucho, sólo con ponerle los niveles, el brillo y la saturación en automático ya ganan mucho y con el tampón de clonar se arreglan las posibles imperfecciones que tengan los originales. - Y, finalmente, hay que tener en cuenta que estas diapositivas o negativos se obtuvieron con cámaras que no guardaban tanta información de la imagen obtenida como las actuales. Estaban pensadas para imprimirlas posteriormente en papel de un tamaño normal, digamos 10x15 o mostrarlas con un carrusel de diapositivas. Ahora estamos pretendiendo una resolución mayor en la pantalla de un ordenador por lo que probablemente nos encontraremos con algunas imágenes que nos parecen (y posiblemente lo sean) un poco borrosas. No considero que sea culpa del escáner para nada. La calidad del aparato es muy buena y la transferencia de las imágenes al ordenador es sencilla. No se puede pedir más. Es un dispositivo que recomiendo sin dudarlo.
C**E
Easy to use and good fun preserving old photos.
Trustpilot
2 days ago
5 days ago