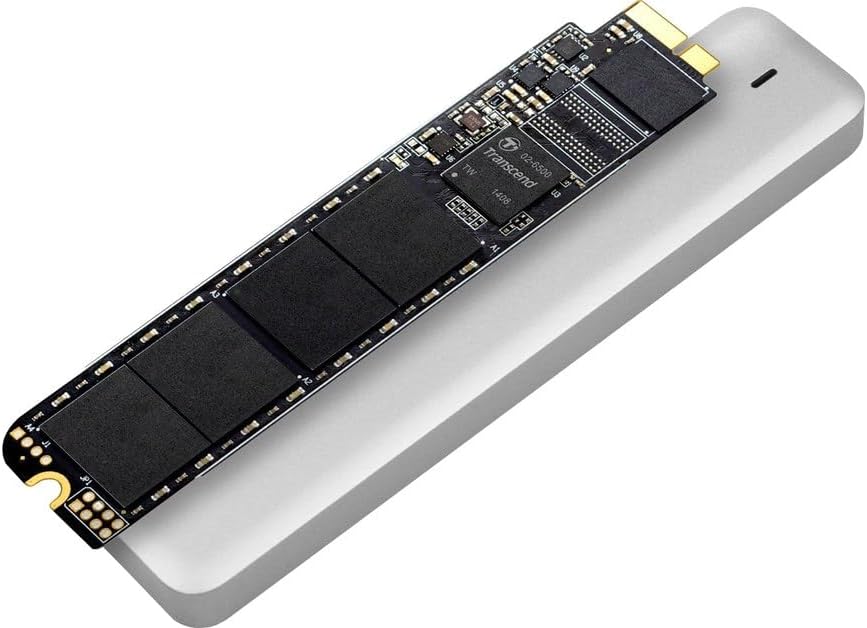
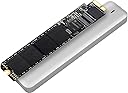
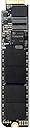
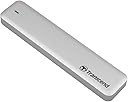
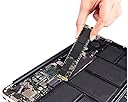
🚀 Elevate Your MacBook Experience!
The Transcend 240GB JetDrive 500 is a high-performance SSD upgrade kit designed specifically for select MacBook Air models (Late 2010 - Mid 2011). Featuring a next-generation SATA III 6Gb/s interface, this drive ensures rapid data access and transfer speeds. The kit includes everything you need for a hassle-free installation, along with the JetDrive Toolbox for monitoring your SSD's health. With an operating temperature range of 0 to 70 degrees Celsius, this upgrade is built for reliability and efficiency.
D**S
A great upgrade for a great machine
A great upgrade for a great machine. The Macbook Air lacks only in disk space. If you take a lot of pictures or video, or keep huge email archives, the MacBook Air's 256 GB storage disappears fast.The Transcend hard drive replacement is easy to do, and is a good value, all things being equal. I've installed the 960GB unit in two of our MacBook Airs, and in both cases it went flawlessly. I was shocked at how easy it was to open up the Air - nothing is glued or soldered, and no special tools are required that you don't get in the Transcend package. At least for the mid-2011 Airs, I can't speak to the rest of the line.The Transcend drive also substantially faster than the original hard drive, esp. as it gets full. SSDs can slow down a lot when they start to near capacity. In my case, a Blackmagic disk speed test showed transfer rates of about 120 MB/s with the original mac drive (at 90% full), and 350 MB/s with the Transcend drive!The box includes everything you need. They really thought about the details. They provide a custom housing that you use to transfer hard drive images, which after the upgrade turns your existing SSD storage into a USB hard drive. It includes two Torx screwdrivers, one to take the back off your mac and the other for the housing. They even include a soft case for the enclosure, and little rubber pads to cover up the screw holes. Nice touch.The one thing it lacks is step-by-step instructions for using Disk Utility to make a disk image. However, you can find those instructions a lot of other places online. It's not really hard to do a back-up and restore, but you do need to boot into recovery mode to do a clean backup. And if you screw it up you might accidentally erase your existing data. So as always, make sure you have a good back up of everything that is important to you before you start the upgrade.
O**.
Great kit, good price, easy and effective
The packaging is tight and includes everything that you need and then some. The enclosure for the SSD is solid and very Apple'esque and the included sleeve for the drive is a good quality. Including the tools to perform the task is top notch. The drive was configured and installed within an hour (took time to copy the data from the old drive). System response time is great and everything seems to be working as expected.A few things worth noting:1. The kit does not include the JetDrive Toolbox software so you will have to download it after the install. The file is small and the tools seem pretty useful (but are not required).2. The included instructions are a little thin. I highly recommend watching the installation video posted on Transcend's site.3. While the drive seems very snappy, it does seem to take a little longer to boot from a shutdown state. This could just be my imagination as I never timed the old drive. Once booted, though, she seems to fly.4. Be sure to check the specs of your Mac to make sure that you can use the drive. Transcend include links to check the information on their site and it is certainly worth the time to verify prior to ordering.Even though I have only had the drive installed for less than an hour, I am very impressed with the overall kit, the ease of the installation and the performance. If you are in need of some extra storage for your Mac, I don't think that you will get more bang for your buck than this.
J**O
Great product. High quality. Easy installation.
The product is very well packaged with all the supplies you need to swap your SSD's. No additional tools needed for this upgrade.Here's what I did to upgrade my Macbook Air Mid 2011.1. Order this product.- Received it in 2 days with Amazon Prime.2. Watch instruction video on youtube. The link to the full instruction is here - http://youtu.be/ikZvyH7P-8o- Transcend website has a short version of it, and I actually upgraded by SSD after watching the short video. It seems that the short version does not tell you to disconnect the battery before you swap the SSD's.3. Follow the instruction video (so easy!!)3.1 Clone (copy) current SSD in your MBA to JetDrive- Cloning took ~2 hours to copy 120 GB of data. Some people talk about other cloning program to deal with corrupted file, but I did not have any problem with it.3.2 Swap the SSD's- Don't be afraid of opening the MBA.3.3 Start your computerFew things to keep in mind (This happened to me, but it may not happen to you.).- Dropbox: When the computer first booted with new JetDrive, I had to login to Dropbox again, and they downloaded file list and synced again. If you have a dropbox installed, sync your data with dropbox server just in case.- MS Office: I had to enter the product key.- Other programs: I haven't run all my programs, but Matlab and Adobe CS5 work just fine.- Slow booting: The cold booting took about ~45 sec. after upgrade (~15 sec. before upgrade). I googled around and found a solution to this. Some other Mac users experienced slow booting after Mavericks upgrade and they cleared the "kext caches" and set startup disk again. I followed the instruction (2~3 lines of commands in terminal), now it's fast as before.Although I had little hiccups after the upgrade, I still want to give 5 starts. Great product.
A**O
Buen servicio
La rapidez y que el producto fue lo que solicité
R**M
Fit for the need
Excellent kit for the purpose. Very easy to install
J**N
Perfecto en un macbook air de mediados de 2011: Mejora y actualización con muy fácil instalación
Compré este kit al que tenía echado el ojo hace un par de años para actualizar el tamaño del disco duro de mi macbook air de mediados de 2011. Aproveché para hacerlo en el momento en que la batería ha dado problemas para no tener que abrirlo dos veces y creo que debía haberlo hecho mucho antes. No sólo he aumentado la capacidad del disco sino que se han incrementado la velocidad y rendimiento del ordenador. Además ahora tengo un disco duro externo de pequeño tamaño y capacidad aceptable que también es muy rápido (se aprovecha el antiguo ssd como disco duro externo en la carcasa que viene con el kit.La instalación es muy sencilla y viene bien detallada en el propio folleto del kit. Además, hay muchos tutoriales de facil acceso (con poner el modelo de ordenador y cambio de ssd en google ya encuentras unos cuantos). En cualquier caso lleva pocos pasos. en primer lugar si quieres conservar el estado actual de tu ordenador (instalación, programas, archivos), debes comenzar por una copia del disco duro. ha que montar el ssd nuevo en la carcasa (son tres tornillos Torx, con el destornillador T5 incluido y el ssd se inserta en el adaptador de la caja), conectarlo por usb al ordenador y arrancar en modo recuperación (pulsando Cmd + R), es un arranque con las herramientas de utilidad de disco habilitadas que permite formatear el nuevo ssd (dando el formato correspondiente a nuestro disco duro) y hacer una copia del antiguo disco duro en este. Despúes de apagar el ordenador y de volver a sacar el nuevo ssd de la carcasa, hay que abrir el portatil. Se quitan los 10 tornillos de la carcasas trasera con el destornillador P5 para los famosos (y algo odiosos) tornillos pentalobulados de apple y es mejor colocarlos en algún lugar recordando la posición (no todos son iguales, 8 son cortos de 2.5mm y 2, los pegados a la pantalla son más largos, de 8mm). Una vez dentro, hay un par de cosas importantes: aunque evidentementa hay que hacerlo todo con el ordenador completamente apagado y sin conexión a corriente, hay que desconectar la batería (en mi caso como iba a cambiarla al mismo tiempo, lo primero que hice fue retirar la batería vieja). Hay una pequeña lengüeta (segñun el modelo de ordenador a veces es de otra forma) de la que tirar para desconectar sin hacer destrozos... Antes de quitar el ssd original hay que recordar que está sujeto por un tornillo que sale facilmente con el destornillador T5 incluido. Con eso ya simplemente es tirar con cuidado del antiguo ssd, introducir el nuevo con el mismo cuidado, volver a poner el tornillo T5, reconectar la bateria y volver a a atornillar la caracasa. Antes de esto último, en función de la antiguedad, uso y estado del ordenador puede ser recomendable usar un aspirador de mano que quite pelusas y otras suciedades del interior del ordenador si las hay. El ssd viejo se puede introducir en la carcasa que viene y usarlo como disco externo, va muy rápido. Por último, en la página de transcend se puede encontrar un software gratuito, "jetdrive toolbox" que optimiza el uso del disco duro y permite habilitar el soprte TRIM de este nuevo SSD.Estoy feliz con este nuevo disco duro (y con el uso del antiguo) que ha aumentado la capacidad del ordenador y además ha mejorado la velocidad y el rendimiento de mi macbook air, creo que tengo para unos cuantos años más sin cambiar de ordenador. La única pega que le puedo poner es que el precio es elevado (yo me compré el de más capacidad), pero lo cierto es que es un precio acorde a lo que ofrece.
S**M
I am so happy I did this, great product and installation process easier than I anticipated
I had only ever opened the back of my mid 2011 MacBook Air once, to install a new battery a year ago; that empowered me (60 year old and not technologically inclined) to try replacing my 120GB Hard Drive after a couple of years of storage problems. I ordered my JetDrive 500 after reading all the reviews and watching the Transcend You Tube video of the installation process. I was prepared to have to deal with hitting a snag, but thought I would give it a try. I would never have done so if Transcend had not made the video on installation. I also read that a few people reported increased operating speed after installation, although Transcend said it should be the same. I went through the process yesterday and encountered no problems at all, although anyone should allow at last 3 hours to complete the process. My hard drive was almost full and the transfer to the JetDrive 500 took more than 2 hours but I was expecting that and could monitor the progress.I am extremely impressed with the thoughtfully designed packaging that enabled me to handle the drive whilst barely touching it and instructions that enabled an idiot like me to replace it myself! Today I erased my old internal hard drive, I love that you can us the provided case to turn it into an external hard drive, very handy. Oh and for me there is a big difference in speed, easily twice as fast as before. I wish I had done this a year ago, memory problems solved and now I can go back to storing video on my laptop again!
N**Y
It is working good. Pros 1)The quality of product is beyond my ...
Bought this as a replacement for Mac Book Air 13". It is working good.Pros1)The quality of product is beyond my expectations.2)Comes with a pair of screw drivers, so that you can do the switching yourself3)Can also be used as an external drive also
Trustpilot
1 day ago
5 days ago