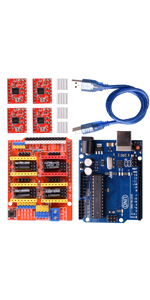
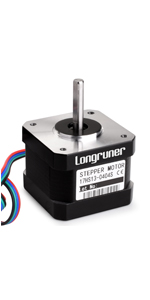
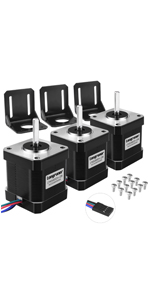
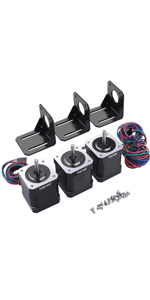
Let’s get the bad stuff out of the way first. 1. No power supply included - image shows a 12V power supply I bought to go with it. 2. No instructions. Plenty on University of YouTube but some are conflicting. Now the good. With a power supply and a vague idea of what you’re doing it’s fast to set up and get working. I’ll be using it for a small DIY CNC router. Instructions. 1. Plug CNC shield board into Arduino board. 2. Plug three (4 if you want but there’s only 3 steppers so 4th doesn’t do anything) drivers into the CNC shield. It is vital to get these the right way round. The EN pins on the drivers need to align with the EN sockets on the CNC shield. Alternatively look at photo which shows them plugged in the right way. 3. Plug the stepper motors into the X, Y and Z sockets on the CNC shield board. It doesn’t matter which way round they’re plugged in, they’ll fit both ways and the only difference is which way the motors turn. If the motors turn the wrong way for your application, switch the leads round or reverse the direction in your software set up. 4. Jumpers are supplied in the kit. You don’t need to use any to get the kit to work. However, you control how much the steppers move per pulse by using jumpers in the 3 sockets under each driver board - download the driver board spec sheet to see the list of combinations. 5. Wire in the power supply. Power supply can be 12-36V (I used 12V). DO NOT turn the power supply on yet. Never turn the power supply on if the stepper motors aren’t plugged in (danger of frying the driver;board). 6. Stick the heat sinks (self adhesive) onto the top of the chip on the driver boards. Make sure the heat sink isn’t touching any pins on the board. 7. Download and install the Arduino IDE onto a laptop. 8. Plug Arduino into lap top with supplied cable. I used a Mac and had to buy a new cable as the supplied cable has a big fat USB A plug on the computer end whereas a Mac has USB C ports. You can find/write C to run the steppers from the Arduino IDE now but following instructions are for a CNC machine running g code. 9. Download the GRBL library, and use Arduino IDE to upload it to the Arduino. At this stage the Arduino is powered by USB, you do not need the power supply wired up yet. 10. Download and install the Universal g Code Sender app onto your laptop. It should automatically detect the Arduino plugged in by USB. At this point, if you plug the power supply in to the CNC shield board, you can use the “jog” buttons and the steppers will move. 11. If using Fusion 360, generate a tool path. Select “GRBL” as the machine for export and export a g code file. 12. Open the g code file from within the Universal G Code Sender app. Press run and the steppers will now whir away. That’s the basics. Now set up the calibration inc jumper settings and voltage limits (potentiometers on the driver boards), plug in the supplied limit switches if necessary. Phew…