Description
🔋 Power your day, fix your way — DIY battery brilliance!
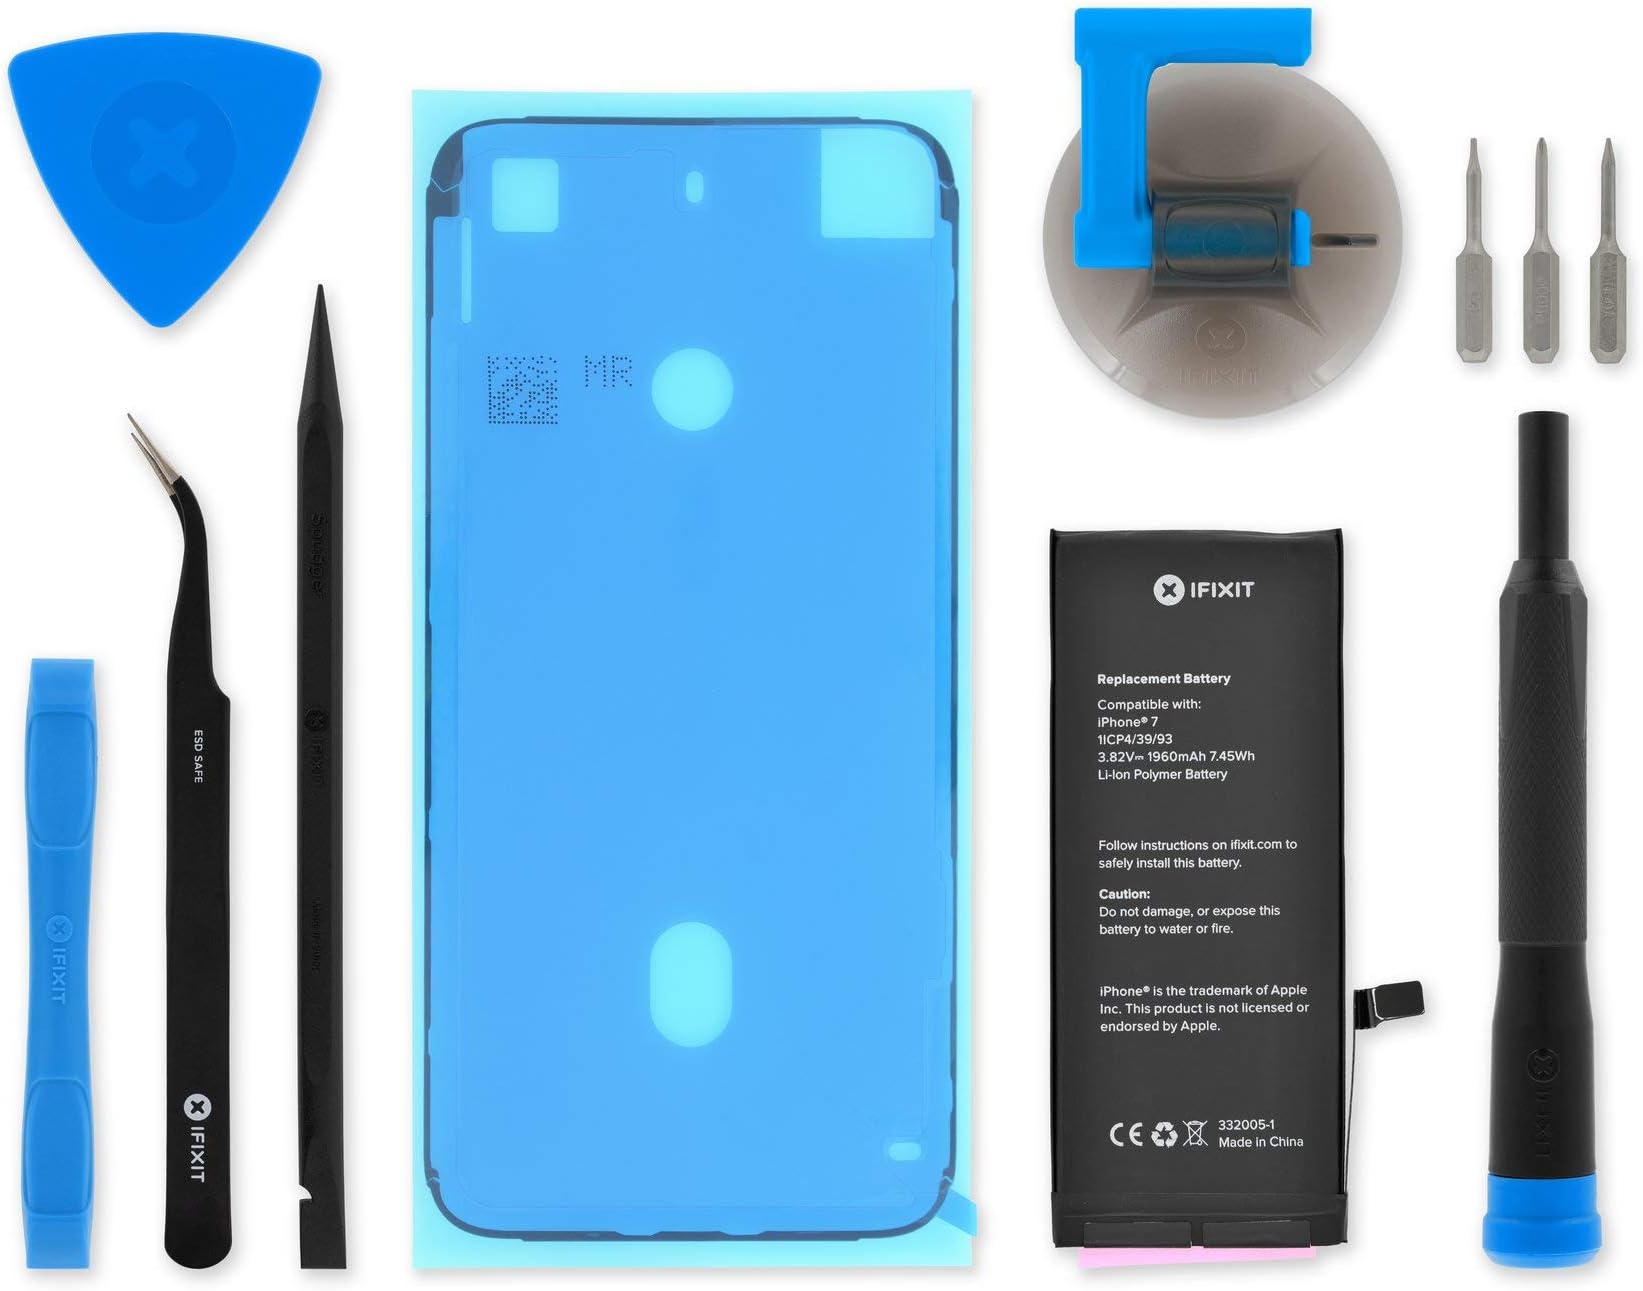
- DIY MADE EFFORTLESS - Includes all essential tools and adhesive for a seamless, professional-grade battery replacement at home.
- POWER UP YOUR I PHONE 7 - Boost daily runtime with a 1960mAh lithium-ion battery that keeps you connected longer.
- WARRANTY BACKED CONFIDENCE - Enjoy a full year of coverage with iFixit's trusted 1-year battery warranty.
- CERTIFIED QUALITY RELIABILITY - Tested to ensure 95%+ capacity and zero charge cycles for like-new performance.
- UNIVERSAL I PHONE 7 COMPATIBILITY - Fits all iPhone 7 models (A1660, A1778, A1779, A1780) for guaranteed fit and function.
The iFixit Battery Compatible with iPhone 7 is a premium lithium-ion replacement battery with 1960mAh capacity, designed to restore your phone’s runtime. It comes as a complete repair kit including tools and adhesive, compatible with all iPhone 7 models, and backed by a 1-year warranty for reliable, professional-grade DIY repairs.