We remain fully operational. Our teams are working around the clock to ensure your deliveries continue safely.

DOWNLOAD THE APP


Customer Services
Copyright © 2025 Desertcart Holdings Limited
DOWNLOAD THE APP
Buy anything from 5,000+ international stores. One checkout price. No surprise fees. Join 2M+ shoppers on Desertcart.
Desertcart purchases this item on your behalf and handles shipping, customs, and support to Vietnam.
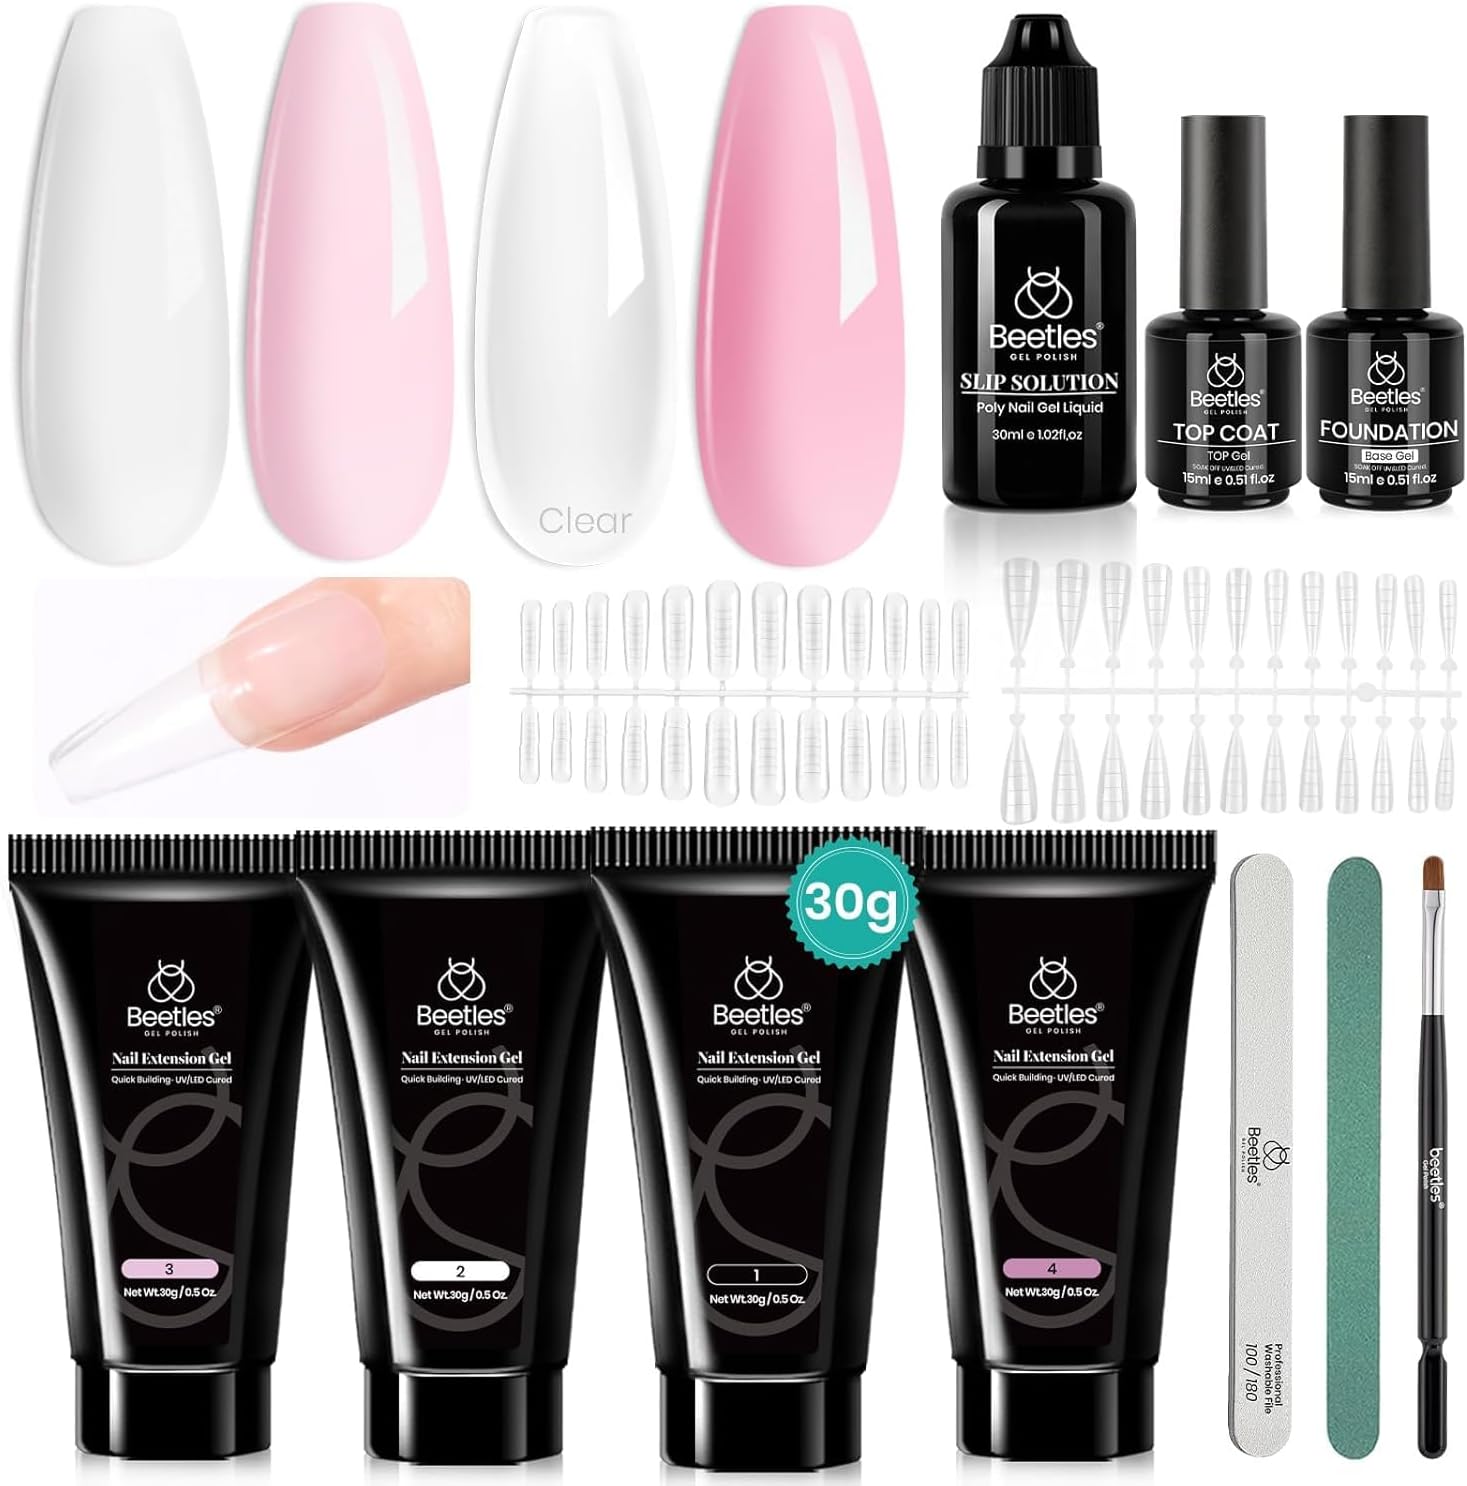
💅 Elevate your nail game—glossy, durable, and salon-worthy at home!
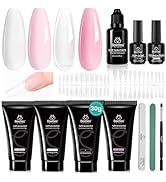
The Beetles Poly Nail Extension Gel Kit is a comprehensive, toxin-free nail enhancement system featuring 4 vibrant gel colors, 48 nail molds, and all essential tools. Designed for quick curing under UV/LED lamps, it delivers professional-quality, long-lasting nail extensions at home—saving you time and money while empowering your creativity.


| ASIN | B07MGGXGW7 |
| Best Sellers Rank | #25,355 in Beauty & Personal Care ( See Top 100 in Beauty & Personal Care ) #6 in Nail Thickening Solution |
| Brand | beetles Gel Polish |
| Brand Name | beetles Gel Polish |
| Color | 0-Pink Tint Nail Strengthening |
| Customer Reviews | 4.1 out of 5 stars 13,009 Reviews |
| Finish Type | Glossy |
| Finish Types | Glossy |
| Global Trade Identification Number | 00855069007596 |
| Item Form | Gel |
| Item Type Name | poly nail extension gel |
| Item Weight | 1 Pounds |
| Manufacturer | Gelab cosmetics LLC |
| Material | Gluten Free |
| Material Type | Gluten Free |
| Number of Pieces | 4 |
| Size | 104 Piece Set |
| Unit Count | 1 Count |
S**R
HONEST REVIEW WITH TIPS!!!! It’s long, but worth the read!
I found out about poly gel nails from TikTok videos. For months, I thought about trying it out. Since I was stuck in quarantine I decided to look the product up in more depth. I reviewed a plethora of different brands (went down so many rabbit holes, sheesh) and watched a few tutorial videos. I decided it was best to go with this one for a few reasons. Here are 10 NEED TO KNOW TIPS: 1. Almost ALL products are gonna have at least one bad review (probs more if it has more reviews). This one was the best one to me and I’m glad I picked it. 2. If you aren’t a professional then it’s gonna take PRACTICE. Don’t think you can just become a doctor by watching Grey's Anatomy... c’mon now. 3. It was easy to use compared to actual acrylic and not sticky if you use the correct solution. 4. I bought my own UV/LED nail light on amazon for like $19. 5. I also bought my own primer (ITS NEEDED) & I used a 70% Alcohol solution to help shape/mold the gel. 6. Start off with shorter nails FIRST. Don’t get cocky your first time and try to do some long stiletto nails when you haven’t even figured out everything. 7. Prep your nails before anything. Prep. Prep. Prep. That means, wash ya nasty hands, dry off, file/shape/trim, push back or trim cuticles, file your whole nail gently (the whole nail people), buff a little, and add your primer or dehydrator. DO IT. IT MAKES THEM LAST LONGER. Help get your moneys worth. 8. Speaking of lasting longer... Don’t glob a lot of gel on at first! You should start off small and add more if needed- don’t be wasteful. 9. Also, make sure to not press too hard on the nail forms to decrease any spillage or bubbles (clean around the cuticle area with alcohol dampened brush to remove excess). 9. Follow the instructions Aka: apply base coat, cure under lamp 30-60 sec, apply poly gel with brush that is slightly dampened with alcohol solution, shape gel, cure for 90-130 sec (better safe than sorry, so cure them long), then WIPE OFF with a cotton ball that has rubbing alcohol on it to get rid of the stickiness, shape/file the whole nail even if the shininess is tempting to keep (this is important), apply top coat evenly, cure again for a long time, wipe off again with alcohol, apply cuticle oil, and boom you’re done. I hope this can at least help one person. I love it and everything came perfectly packaged. The colors are great, file works wonderfully, brush/applicator is nice quality, nail forms fit my nails, and came with a lot of them. The tubes are “small” to some people, but if you use my tips on not being wasteful and how to make them last long then you’ll be fine. Goodluck!!
S**L
BEST GEL POLISHER!
I recently purchased this nail extension gel kit with 2 beautiful pink shades I absolutely adore and I’m really impressed! The colors are perfect ranging from soft blush to bright fuchsia giving me plenty of options to create elegant and trendy nail designs. The gel formula is thick but easy to work with, and it cures quickly under my UVLED lamp without any sticky residue. The finish is glossy and smooth, and the gel feels durable and long-lasting. I’ve had my nails last almost two weeks with minimal chipping or lifting, which is great for gel extensions. The kit comes with clear instructions and all the basics I needed to get started, which was super helpful since I’m not a professional. The pinks layer beautifully and blend well if you want to do ombre or mix and match styles. Overall, this kit is perfect for anyone who loves DIY nail extensions and wants quality colors that last. Definitely worth it!
A**N
Very easy clean up
Very nice, they work well.
M**D
Amazing!
This is my first time using poly gel. I bought it so that I could cover a nail that has a permanent split and was beginning to break below the skin line. I can’t really afford (time or money) to go to the salon, but I need to cover my nails, because they are soft and peel often. I do tons of dishes, I work in my yard, I have kids and I put in a lot of work with my hands, I also help my husband with his woodworking business. This poly gel is amazing! I’m impressed. The first set I put on did not turn out great, and I had to remove them after less than a week (which was a chore in and of itself, as it has to be filed off); however, the second time I tried, I knew a little bit better where I’d messed up the first time. A couple of things: the forms really didn’t fit my tiny fingers very well, they kept lifting during curing, but as long as I did one finger at a time and held them down—gently—they were okay. Another tip: make them thicker. Especially if you are hard on your hands. I had one break on me while opening a dog food container latch, and when I looked at it, it was so thin, no wonder it snapped. (That was my first application, and I used the light pink). But as for wear, my second application (clear poly gel) has been on for 3 months, I’ve done two fills a month, with only one complete removal of both my thumbnails. I love the clear poly gel because I don’t feel bad covering it with whatever gel polish color I want to wear. It goes on fairly easy, I do have a little bit of an issue getting it smooth without bubbles, but I purchased an e-file to help with shaping and removing, and it’s made a huge difference. If you have some time to do the work, it’s well worth the results, I am so impressed! I never thought I could get my nails ton look so good without having to spend a ton of money every couple of weeks, and leave my house to go to a salon. It still takes me time, but it’s really no different than if you did your nails with regular polish had to sit and wait for them to dry. Be patient with it, but you will love the results if you do.
S**.
DIY'er new to Poly Gel
The kit was packaged well and contained nice sizes of gel, base, and top coat. The brush was beautiful and seemed to be good quality for the money. I have used he Beetles base and top coat before so I knew I liked them. This is my first ever poly gel kit and I am not a professional nail tech. I did attempt to do several nails and thought it seemed easy and loved the idea. Since I don't have experience with any other gels I really can't speak to the gel it's self or compare it to others. It seemed easy enough to work with. I used the dual forms that came with the kit and I think that was where my problem was. I filled the form with gel and applied it to my nail, I had to press down to keep it from popping up and when I pressed down, everything oozed out. I let go to clean it up and they lifted off my nail again. I had to hold them down while putting my hand in the light. I was so preoccupied by trying to keep them on that I forgot to check under the nail.... what a mess-and I cured it that way (sigh). The forms seemed very narrow and I felt like the "C" curve was excessive,maybe a stiletto style, but what do I know? Well- I do know I didn't like the way they looked so I stopped with one hand, tried to clean up everything under the nail and cut them back. I did not attempt the second hand. If the kit had come with paper forms I would have given it another try with those. Because I found the dual forms provided, difficult to work with, I decided to return it. The issues I had with the dual forms may have been my lack of experience so take that into consideration when you read my review. I think the poly gel, top coat, base coat and the tools provided with the kit were great. The dual forms are my reason for 3 stars.
C**L
This is for the ladies who enjoy doing their nails!
I have now done my nails three times since I bought this kit. I am OBSESSED! I already had my own UV/LED lamp, slip solution (isopropyl alcohol), and acetone. I bought in addition to this kit a nail dremmel, some nail files (the good ones), a pre post nail application cleaner, along with another beetles gel color kit. I feel like I’m set for the rest of the year, if not more! These nails can last from 2 to 3+ weeks, my first and second set I did only have one nail break each time. Keep in mind the gel application takes patience and practice in order to perfect the look you’re going for (clue the thinner the gel application the easier they may break). Each time I do them I feel like I get better and faster, plus these can get thick without having that heavy annoying acrylic feel!! This most recent set hasn’t had ANY break and I’m going on 2 and 1/2 weeks. The dremmel will help make your nail shape look much more professional, I constantly get compliments on my nails and people can’t believe I did them on my own. If you like doing your own nails and getting a gorgeous look without having to argue with a nail tech or asking them to fix things then this really is for you! My best friend bought the same kit and items I did and we had a nail night so she could practice and test out her kit, she loved it too!! This is not for people who don’t like doing their nails, or are looking for funky creative styles that they’re not willing to put the time and effort into it. This will be trial and error, but at least you’re not breaking the bank. The first time I did my nails it took about two hours (I’m a crazy perfectionist) I did light pink. but the second time it was an hour, I did a mix of clear and dark pink. The last time it was 45 minutes I did an ombré of dark pink and white but it was very natural looking so I ended up painting them multicolor. I always suggest for right handed people to start with painting your right hand, in the beginning you’re not tired and able to be extra patient, so that way when you get to your left hand it’s a breeze. Pro tip: WATCH YOUTUBE TUTORIALS, you will learn so much and different ways to do the poly gel along with fun design ideas, I don’t think I would’ve been so successful if I hadn’t. These are difficult to soak off after filing them down with my dremmel, they come off but it takes some time soaking in acetone. I think it’s a good thing but if you’re in a rush to soak them off good luck. Filling and fixing them is super easy, all in all I’m very happy with this product!!
B**T
Great gel nails product
First time ever having the "gel nails" experience. Was curious to learn more so this was an experiment. I wanted a layer of protection over my natural nails that grown long and quickly. Am impressed how easy it was to use the product from tubes, to nail forms, and then application to my nails. Bought UV light separately, cured the product, filed and shaped the surfaces, then the top coat and one more curing............ amazing!! I did a great job, although there is room for improvement. It's now 10 days later and my manicure is still looking great!! The shine is amazing, the hardness and protection are doing their job, and I'm very satisfied. Recommend you set a good amount of time aside if it's your first time. I did one thumbnail first. The next four fingers 2 days later. Then the entire other hand a week after that. Figured if anything was objectionable, I wouldn't have wasted my time. Feel certain the next sessions will get easier and faster and better with time. Need patience though!! Use less product than what the You Tube videos show, read all the enclosed brochures, watch the tutorial videos several times over, and start with right hand first if you're right-handed, left first if left-handed, it will force you to be patient! Don't get flustered and you'll do great!! Almost forgot to mention, there is no horrible odor as with conventional nail polish. Yes I do recommend this product.💅💕
T**S
Awesome starter kit & Easy to use
I bought this set as my first foray into gel nails. I've been doing my own acrylic nails for a couple of years now, and it seems like it's been impossible to find the right combo of products that prevent breaking at the tips or acrylic that doesn't give out. I wanted to try gel because the smell is supposed to be much better and my family complains like crazy on how much acrylic smells. I watched a couple of YouTube videos on how to do gel nails. The most important thing seems to be nail prep. Spend extra time cleaning all skin off the nails and trimming and pushing your cuticles back. I used an extra strength primer that I had from doing acrylics (not included with the set). When I do acrylics I tend to pick slightly smaller tips, otherwise the tips are too wide and look odd on my petite hands. What's nice about this set was there were a lot of forms to pick from. If you're like me and your nail tends to be in between sizes, pick a form that covers more of the nail. If it's too small it's harder to hide it like you can with an acrylic. I ended up making them too thick and had to do extra filing. I think with time I'll figure out what's the right amount of gel to put on the form. That being said, these didn't break, crack, or chip. I used the clear for the first time and used a gel paint over it. Putting the gel on took half the time acrylics take. And I got a thumb's up on the smell factor. Next I'm going to try a color and I'm thinking they will be even faster since I won't have to paint them. With acrylics I would just pop them off, but these were tough to get off. I don't know how to fill them either as they grow out. If you're on the fence, go for it! I definitely recommend and I'm excited to try more colors!
Trustpilot
3 days ago
1 month ago